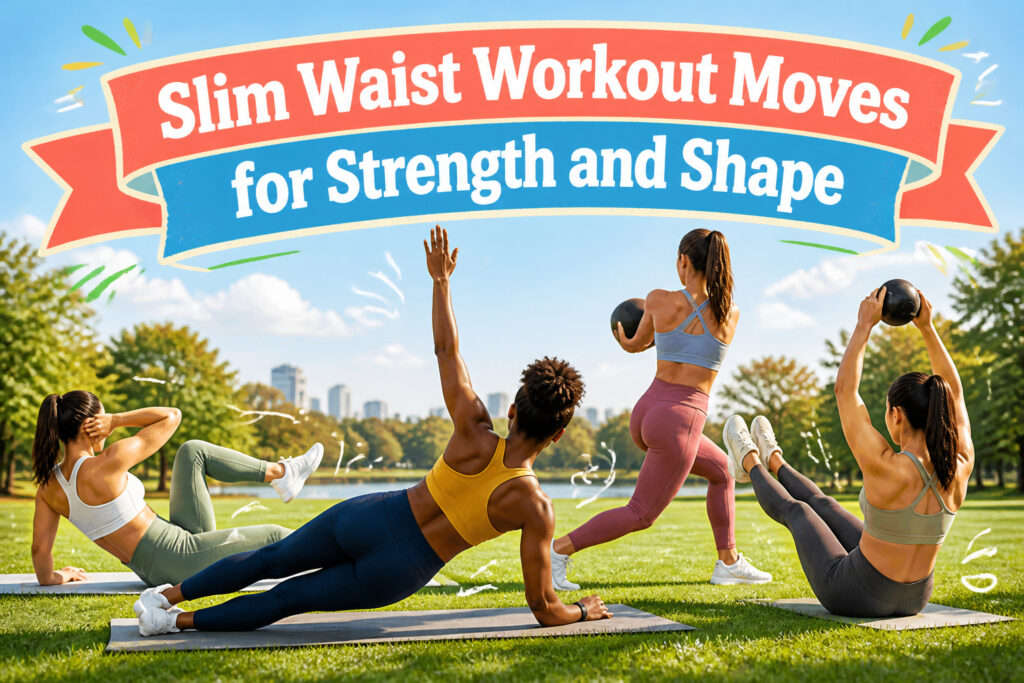
A slim waist workout only shapes what you can already see. The obliques and deep core muscles pull the waist tighter, but the fat layer stays until overall body fat drops, and that deficit, roughly 3,500 calories per pound, comes from the full routine, not any single move. Programs that skip this part leave people wondering why fifteen side planks a week never changed their silhouette. The side plank itself, held clean for even fifteen seconds before the hip sags, is where the real oblique engagement starts.
1. Side Plank
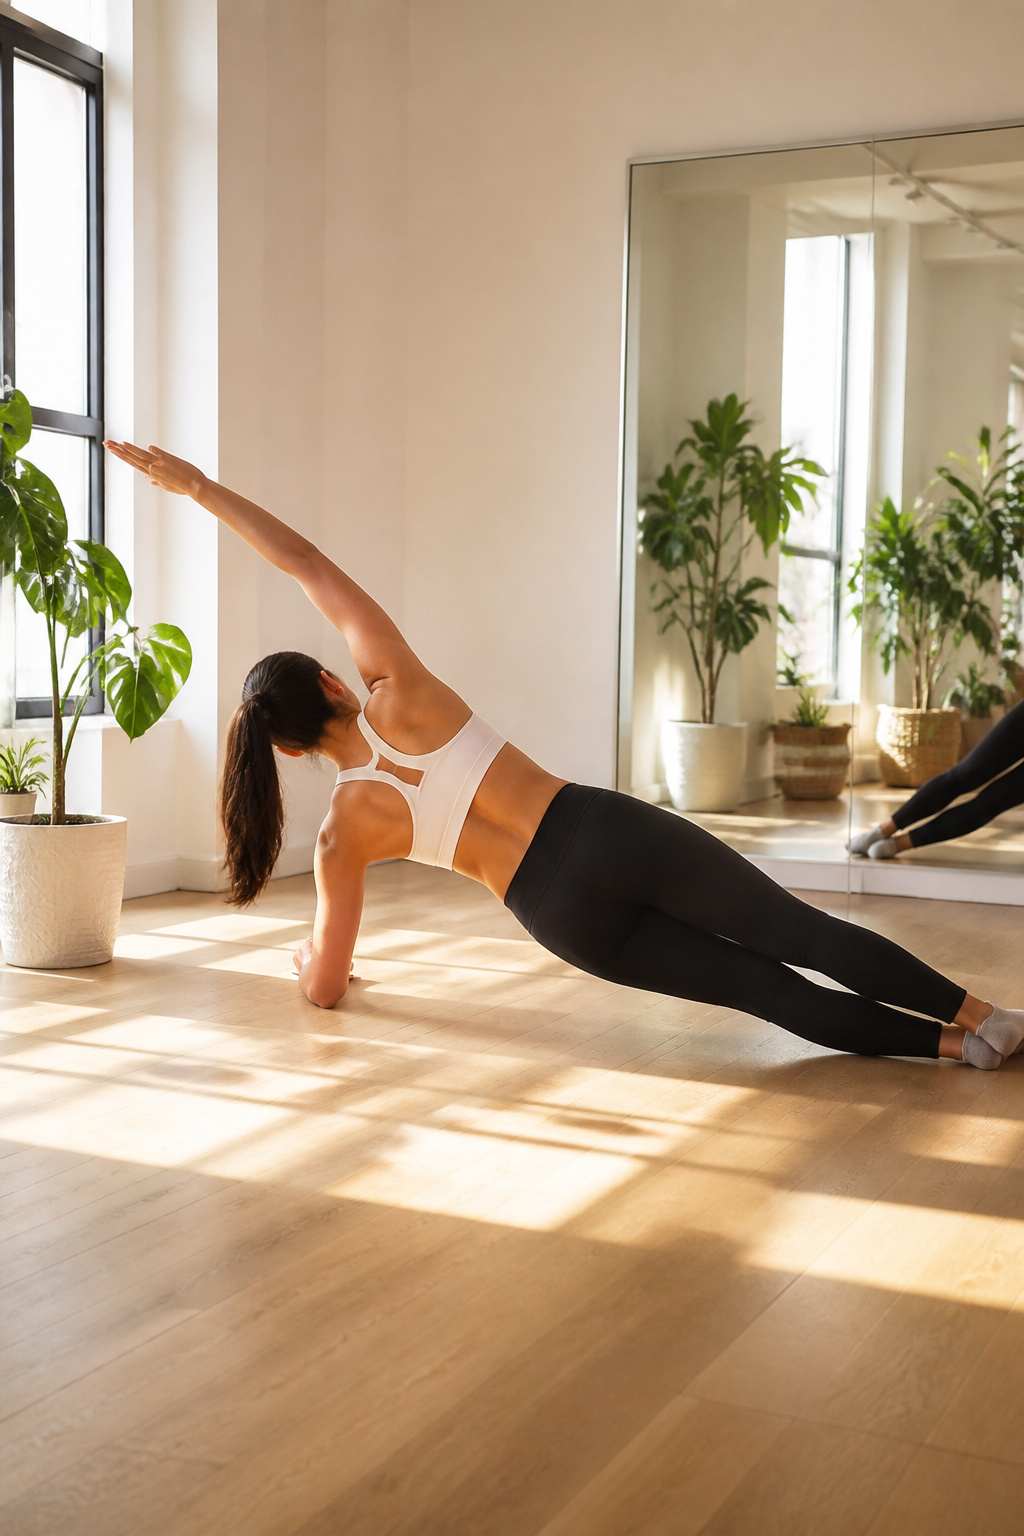
The side plank hits the obliques and the deeper core muscles that pull the waist in, not just the six-pack strip down the front. That is why it keeps showing up in slim waist workout lineups: five different programs I compared all included it, and the consensus is solid enough that I stopped questioning whether it belonged.
Position matters more than duration. Lie on one side, legs straight, feet stacked, elbow planted directly under the shoulder. Lift the hips until the body forms a straight line from head to feet. The free arm can rest along the side or reach overhead for an extra balance challenge. Let the hip sag even an inch and the obliques disengage, shifting the load onto the shoulder and lower back. I catch myself doing this when fatigue sets in, usually around the fifteen-second mark when I am starting out.
Thirty seconds is the hold time most programs prescribe, but that assumes clean form for the full count. If the hip drops at second twelve, the remaining eighteen are teaching the wrong pattern. Better to hold a true side plank for 15–20 seconds, switch sides, and build from there. The waistline definition comes from quality tension in the obliques, not from enduring a crooked position longer than the muscles can honestly manage.

【Multi-functional】Maximize your workout with our plank board, designed to target 6 major muscle groups – chest, shoulders, back, arms, abs, and core. Perfect for core workout equipment, it enhances stability and strength while making planks more effective. The anti-slip surface ensures safety during intense sessions. Whether you're a beginner or a fitness pro, this plank exercise board adapts to all levels, helping you build endurance and tone muscles faster.

A PERFECT PLANK, EVERY TIME - Pure Plank's ergonomic handles take your planking to the next level. Designed for stability and support, they provide a secure grip and promote proper form. No more slips, only effective planks that boost your confidence.

✅COMFORTABLE - Foam covered handles,anti-slip from sweat and comfortable to touching.
2. Russian Twists
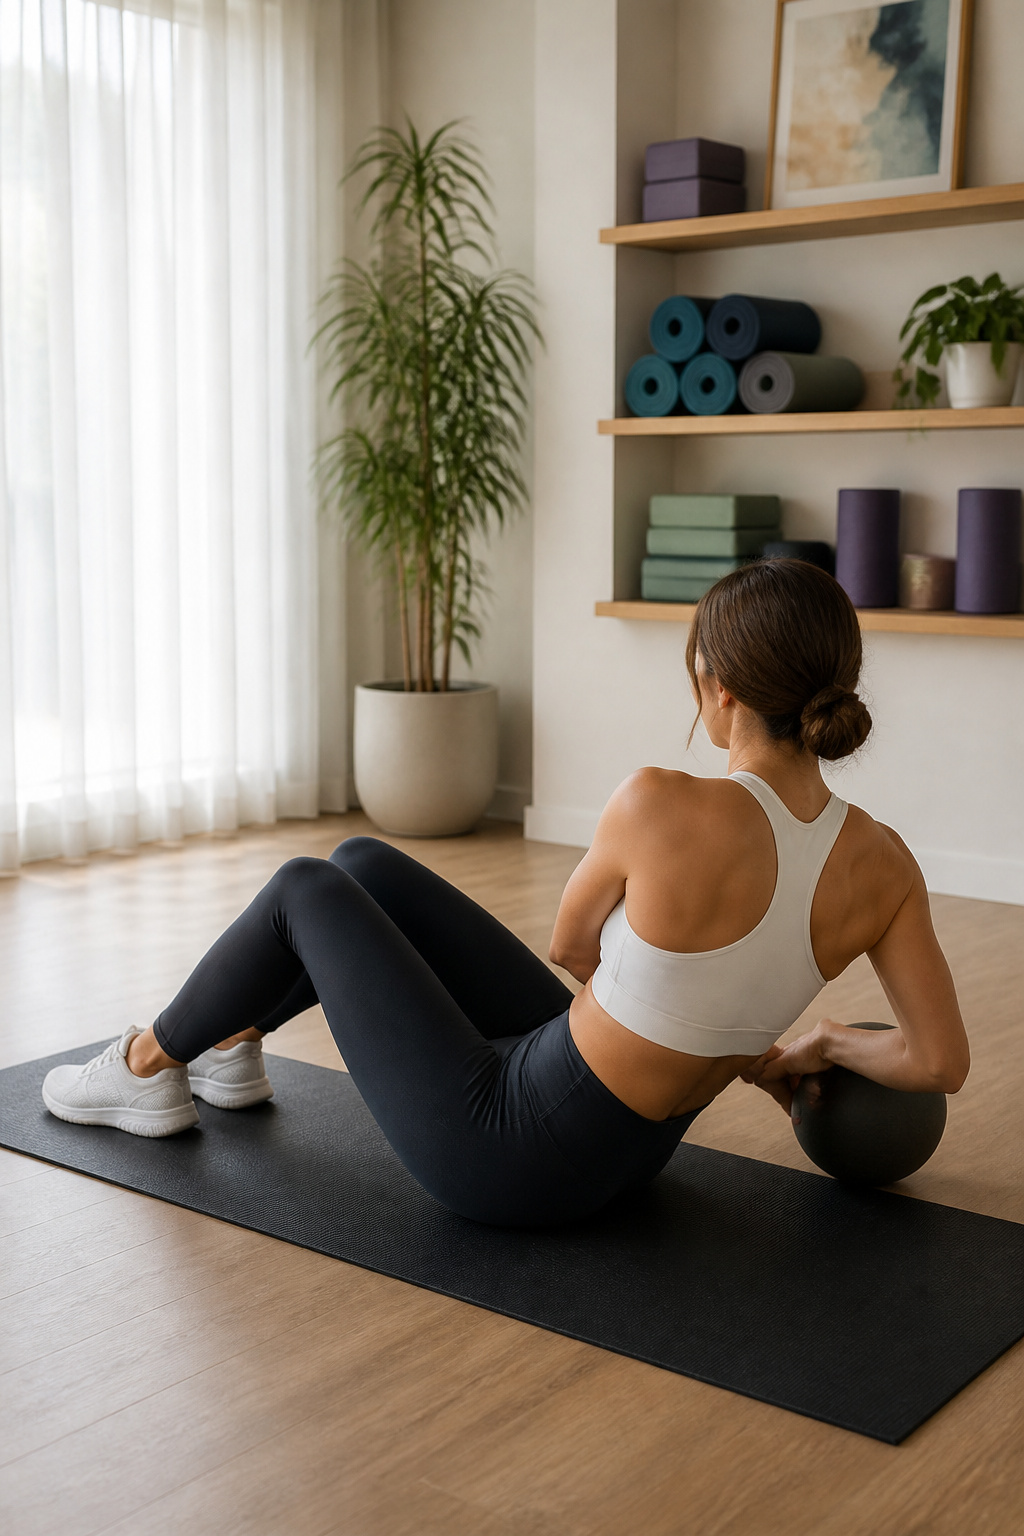
Russian twists sit at the center of nearly every slim waist workout for a reason. The rotation through the torso asks the obliques, the muscles running along the sides of your core, to control the twist and pull you back to center. That side-to-side motion is what builds the definition that frames a narrower middle.
Start seated with knees bent and feet flat on the floor. Lean back until your torso hits roughly a 45-degree angle, brace your core, and clasp your hands or hold a weight with arms extended. Rotate right, tap near your hip, then twist left. That is one rep.
Some guidance lifts the feet off the ground for more intensity. Others keep them down. Feet on the floor wins for control, especially if you are in the 35-54 range and prefer to feel the obliques fire without your hip flexors taking over. Add a medicine ball once the motion feels clean. Beginning without equipment lets you learn the twist from your waist rather than your shoulders, which is the difference between shaping the sides and just waving your arms.

Package Includes: the product includes two medicine balls, weighing 6 lb and 8 lb respectively; These medicine balls are suitable for beginners, intermediate and advanced trainers, providing gradually increasing training intensity to help users continuously improve their physical fitness in different training stages; They are suitable for strength training, rehabilitation training and high-intensity interval training

STRONG CONSTRUCTION: Constructed of durable PVC material, Yes4All Slam Balls are designed to withstand intensive repetitive exercises for a long time; With a heavy-duty textured shell, our fitness balls for exercise offer non slip & stable grip for secure workout experience

3. Bicycle Crunches
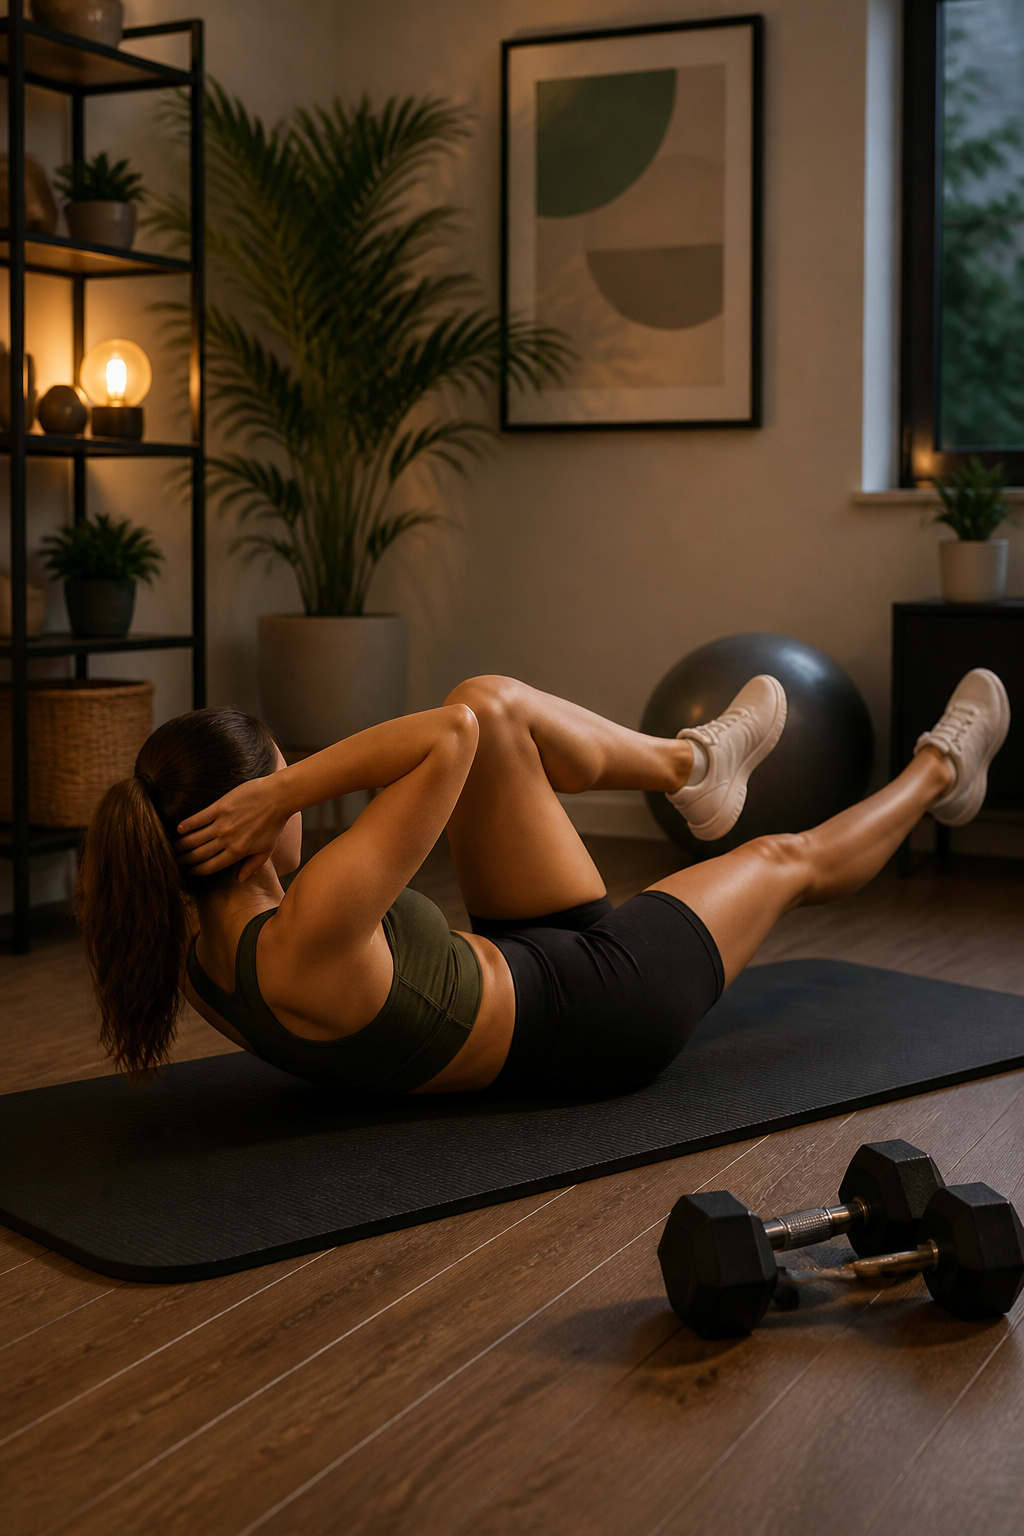
Bicycle crunches hit the obliques and rectus abdominis through a cross-body motion that mimics pedaling. Lie on your back, hands behind your head, legs lifted to tabletop. Bring your right elbow toward your left knee while extending the right leg at roughly a 45-degree angle, then switch smoothly, continuing to alternate.
The tempo matters more than the count. A slow, controlled set lets you feel the torso twist and the abdominal wall engage; rushing turns the move into momentum and cheats the waistline work. Pulling on the neck is the error that undoes most people. Your hands stay light behind your head, elbows wide, so the lift comes from the core rather than yanking your chin toward your chest.
A standing variation exists: feet shoulder-width apart, hands behind the head, you bend one knee and twist to bring the opposite elbow across, alternating sides and squeezing the abdominals throughout. Ten reps per side is the standard count there. For the floor version, newer mothers should wait until baseline abdominal strength returns, since the cycling leg motion and combined twist place demand on a recovering core.

CORE & WAIST TRAINING — Controlled twisting engages your core, waist, obliques, hips and legs for a low-impact workout. An easy way to add rotational movement and core training to your daily home fitness routine.

FUNCTIONAL SWEAT BAND WAIST TRAINER : Waist cincher for lower belly fat made of Latex-Free 100% neoprene 3 layer composite fabric,great for people with sensitive skin,comfortable, stretchy, flexible, durable,fits to your curve,tummy shaper corset move with your body under any action,can matches with your workout bra or wear it under everyday clothes. If you want a feeling of a flat stomach,a small waist,and a tight core,TrainingGirl Trimmer Belt is the first choice in your weight loss journey!

4. Plank Hip Dips
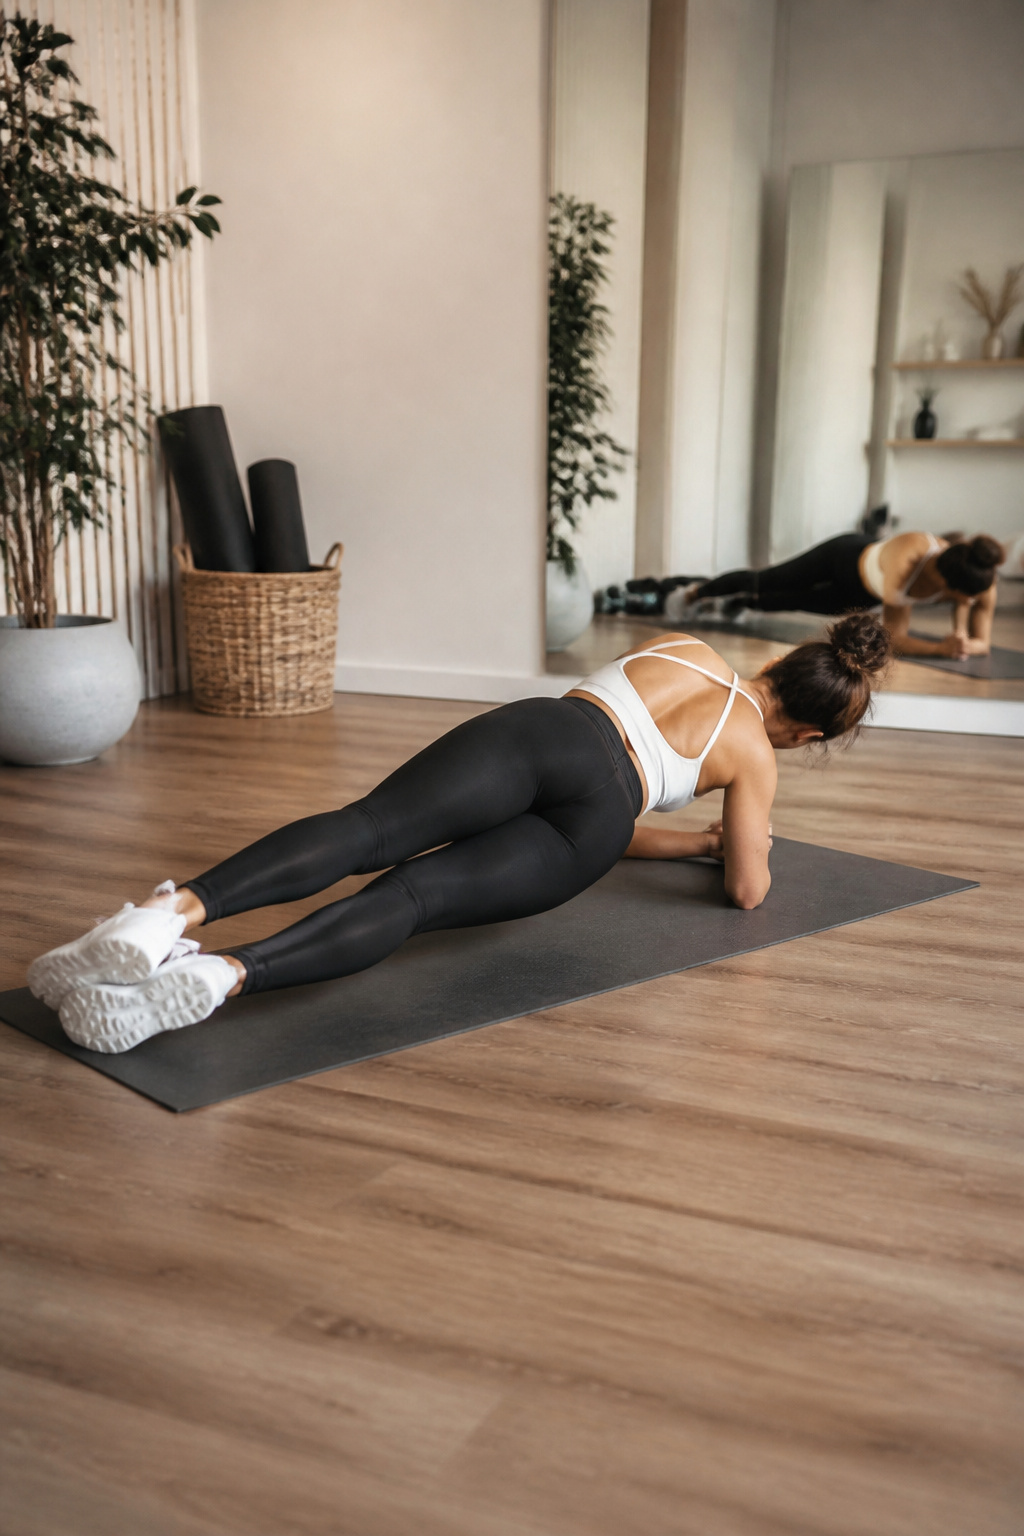
The forearm plank already teaches the body to resist movement, but plank hip dips add a controlled twist that the static version never demands. From that same starting position, shoulders aligned over elbows and the torso lifted in one straight line, you lower the left hip toward the floor in a controlled motion, return to center, then drop the right hip the same way. The torso rotates while the upper arms and shoulders stay stable, so the work shifts into the obliques instead of staying spread evenly across the entire core.
What convinced me, reading through how different programs teach this, is the disagreement on range of motion when starting. One approach keeps the dip small and strict, treating the twist as secondary; another lets the hip come much closer to the ground for a fuller rotation. Two ways to play this: keep the movement shallow and master the shoulder stability first, or chase the deeper dip early and risk the lower back sagging. The shallow version wins if you’ve ever finished planks with tension at the base of your spine, because the moment the hips drop too far, the core disengages and the lumbar takes the load. Keeping the dip small until you can feel the obliques working without any pinch in the lower back is the threshold that actually matters. Hold the forearm plank for 30 seconds first to confirm that baseline stability; only then add the side-to-side motion.

Made in the United States from durable, recyclable high-density polyethylene, the Step stackable aerobic platform is a high-quality addition to any workout program or home gym.


6 Pairs for Training Groups Includes 12 exercise sliders, enough for 6 users or multiple workout stations. Great for home gyms, fitness classes, Pilates sessions, school PE activities, personal trainers, and small group training.
5. Bird Dog
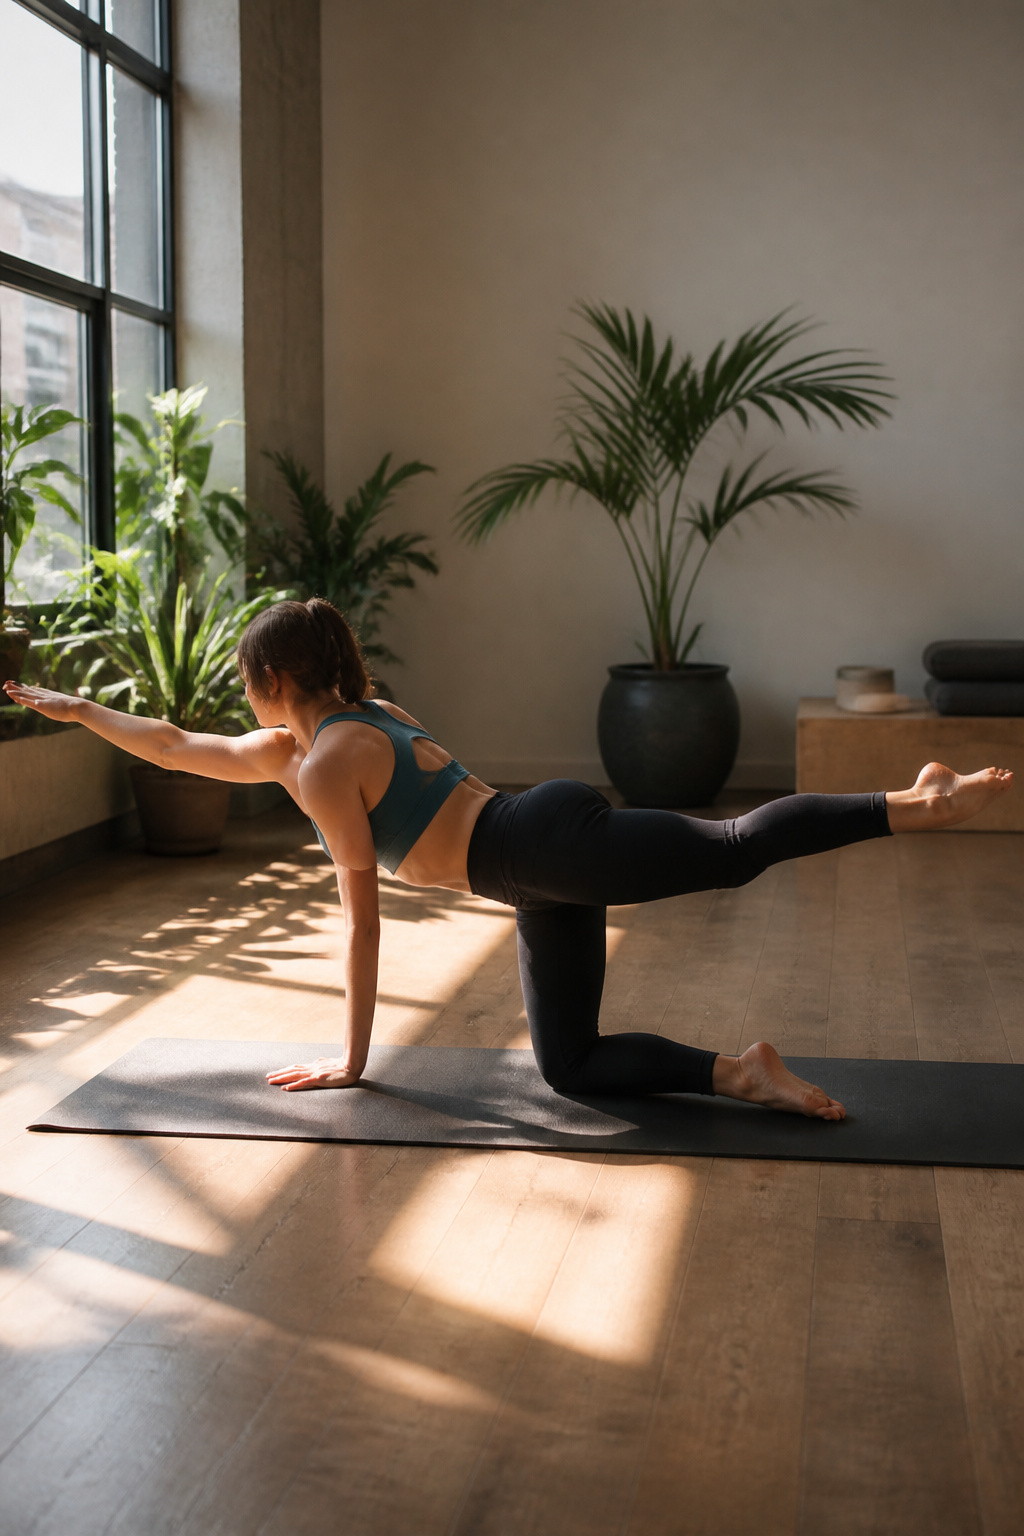
A slim waist workout lives or dies on whether the core actually works or just bounces through the motion. Bird dog is where I finally felt the difference between those two things. The exercise puts you on hands and knees in a tabletop position, then sends one arm forward and the opposite leg back in a straight line while the hips fight to stay level. That cross-pattern extension forces the deep core to fire against rotation, which is exactly the stabilization that carves visible waist definition rather than just burning time.
The flat back is non-negotiable. Let the spine sag even slightly and the lower back takes over, the core checks out, and the whole point disappears. I keep my eyes on the floor, pull my navel toward my spine, and imagine balancing a glass of water on my low back. The sources vary on the arm position: some have it straight forward at shoulder height, others raise it beside the ear. The ear position demands more shoulder mobility but also more torso control to prevent the ribs from flaring. Either works if the back stays flat.
The pause changes everything. Holding the extended position for a few seconds shifts bird dog from a mindless march to an actual stability challenge. Those few seconds are where the deep core muscles, the ones that pull the waist in, are forced to keep working without momentum to carry them. I do 10 repetitions per side, and by the final hold on each set, the shake in my supporting shoulder tells me the right muscles are earning it.

ULTRA-WIDE AB WHEEL: The 3.2 inch dual-wheel ab roller offers extra support and stability compared to the common single ab wheel


【More Accessible & Hassle Free】The 3.2 inch dual-wheel ab roller offers extra support and stability compared to the common single ab wheel. Equipped with a knee pad, this ab roller wheel delivers comfortable workout experience and caring protection. Just embrace the freedom of more thrilling and challenging routines without the hassle of using resistance bands!
6. Superman
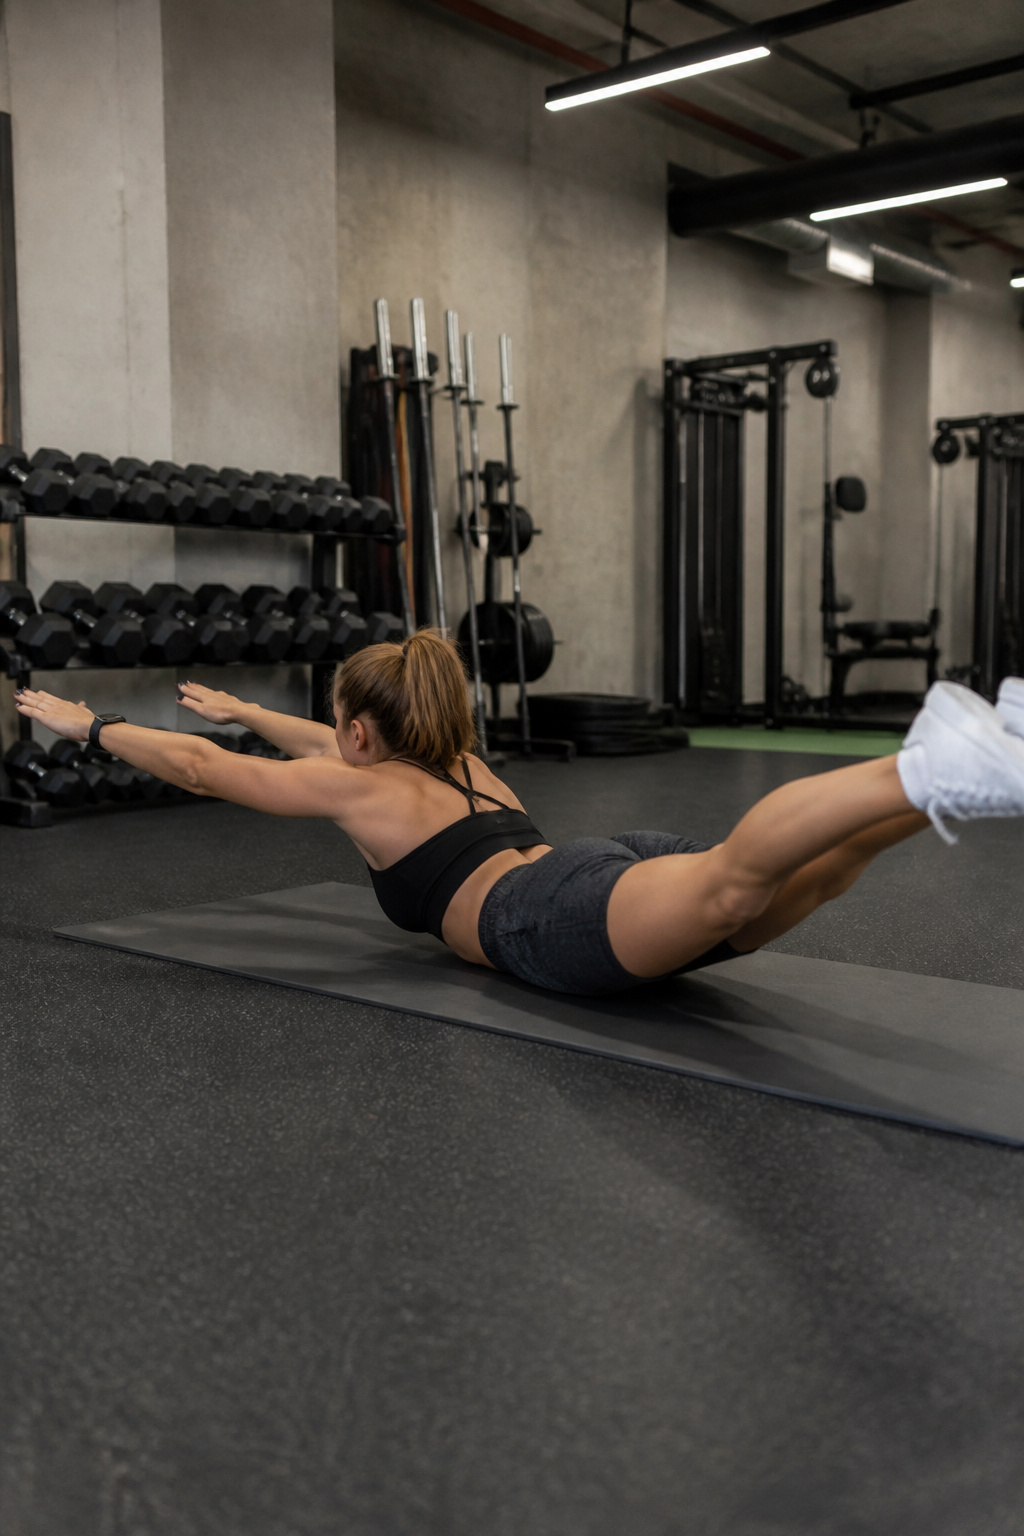
The Superman looks simple, but the first time I tried it I lifted my chest too high and felt tension in my neck instead of my lower back. Lying facedown with arms overhead and legs straight, the goal is to raise arms and legs just a few inches off the floor while keeping the head neutral, eyes on the ground. That small lift is what isolates the erector spinae and deep core stabilizers without recruiting the neck.
Hold for 3–5 seconds at the top, then lower with control. Three to five seconds sounds brief, but the burn accumulates fast when the movement is clean.
Lower-back strength is the overlooked half of waist shaping. A weak posterior chain lets the pelvis tilt forward, which pushes the lower abdomen out and visually thickens the waist. Training the muscles that run along the spine pulls the pelvis back to neutral, flattening the lower stomach and letting the natural narrowing between ribcage and hips read clearly. The posture gain is immediate; the structural change comes with repetition.

Ultra-wide ab roller with built-in resistance and ergonomic handles to help maximize results of ab roll-out exercises


🔥 Strengthen Core & Improve Balance: Sculpt and tone your abs, waist, and legs while enhancing coordination. This 11-inch twist exercise board challenges your stability, activating deep core muscles for a full-body balance workout at home or in the gym.
7. V-Sits
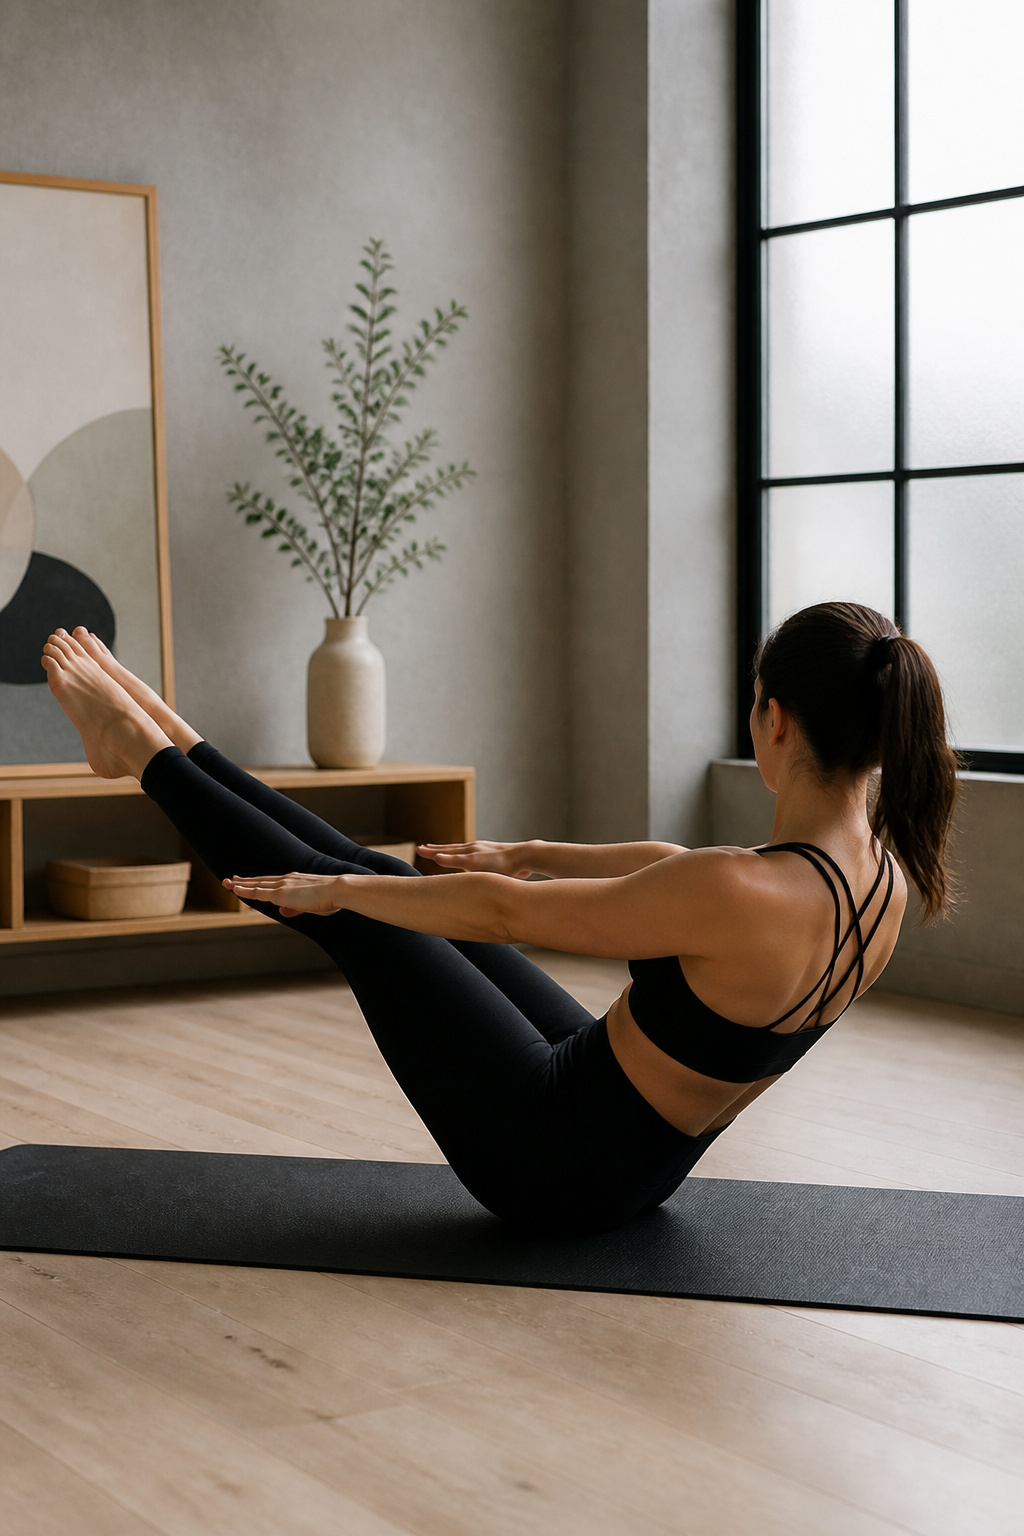
V-sits demand a level of balance that keeps most beginner programs away from them. You lie back with arms extended overhead and legs straight, then lift torso and legs in one motion to bring hands toward toes. Lower until hands and feet tap the floor, and repeat. The full core engagement is what makes this effective for a slim waist workout, but that same engagement is what unravels fast once fatigue sets in. The back rounds, the shoulders shrug forward, and the whole thing collapses into a swing rather than a controlled lift.
Modifications matter here. Keeping knees bent shortens the lever and lets you build the coordination without the full demand. Some people start with feet anchored under a couch or held by a partner. The balance challenge never fully disappears, which is exactly why this move shapes the waistline so directly, but also why programs aimed at newcomers tend to substitute crunches or dead bugs instead.

DUAL-GRIP HANDLES: Made from durable, high-quality rubber with ergonomic dual-grip handles for a secure hold and comfortable control during one- or two-handed exercises.

CONSISTENT SHAPE AND BALANCE: PVC soft slam balls for exercise offer balanced and stable workouts; Whether slammed, tossed, or grabbed, a threaded slam ball keeps its shape

CONSISTENT SHAPE AND BALANCE: PVC soft slam balls for exercise offer balanced and stable workouts; Whether slammed, tossed, or grabbed, a threaded slam ball keeps its shape
8. Dead Bug
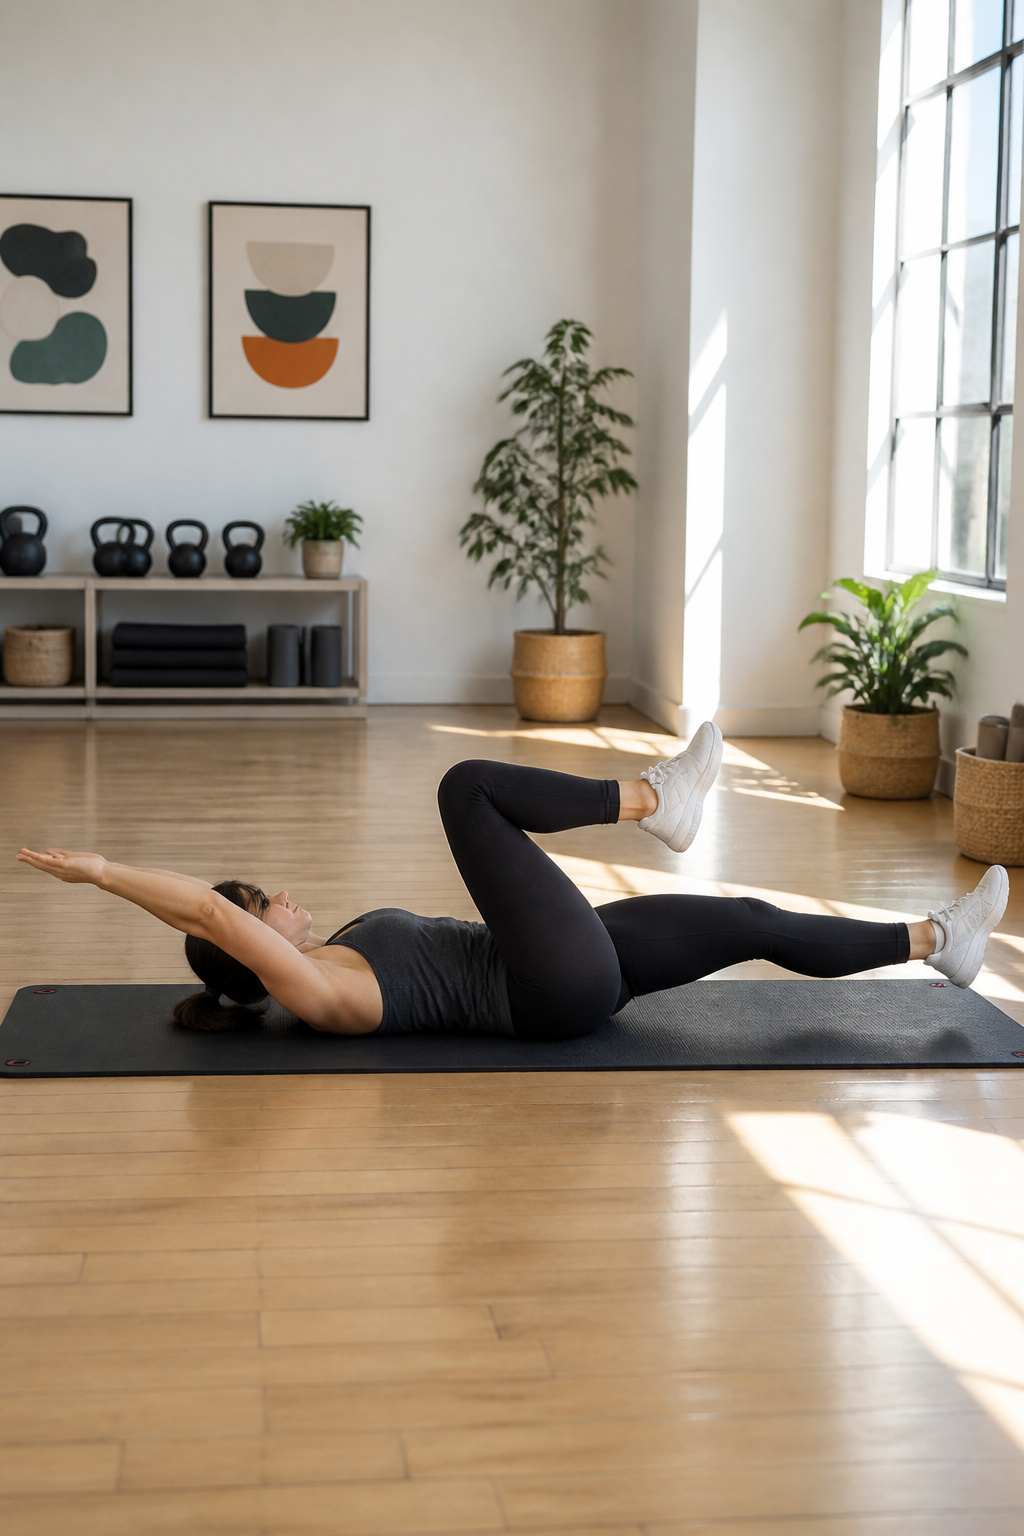
The dead bug looks too simple to belong in a slim waist workout, which is exactly why most people rush past it. Lie on your back with arms extended above your chest and legs in tabletop position. Lower the opposite arm and leg until they hover just above the floor, then return and switch sides. The real work is keeping your lower back pressed to the mat the entire time; that small detail shifts the load from your hip flexors to the deep core muscles that actually pull the waist in.
Exhale as you extend, and keep the ribcage down so the transverse abdominis does the stabilizing instead of your lower back arching into extension. The breathing pattern matters more than the arm and leg motion. Most sources teach alternating opposite limbs, though some keep the arms fixed overhead and only move the legs; either way, the anti-extension principle stays the same. I find the version with both arms reaching up gives better feedback, because you feel the ribcage flare the moment you lose tension.
For waist results, 2–3 rounds of 8–12 reps, three to four times per week, fits into a balanced routine. The dead bug trains the deep core that supports visible shaping, but the exercise itself does not spot-reduce fat. Pair it with cardio, strength work, and nutrition for the change you are after.

CORE & WAIST TRAINING — Controlled twisting engages your core, waist, obliques, hips and legs for a low-impact workout. An easy way to add rotational movement and core training to your daily home fitness routine.
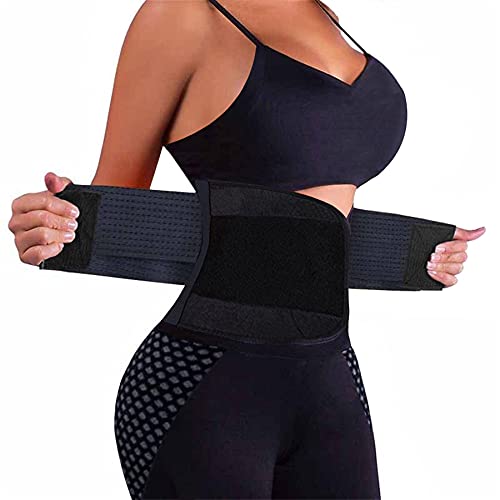
►► WAIST TRAINER TRAINING TRIMMER BELT: Made of comfortable & adjustable & stretchy fabric, Flexible and durable, 100% Latex-Free Neoprene Stretchy Comfortable Finest Fabric, which means it is easy to clean, fits to your body, and will not pitch or irritate your skin. double-adjustment hook&loop for sizing accuracy mesh backing for breathability. Great for postpartum belly abodomn corset
9. Standing Oblique Crunch
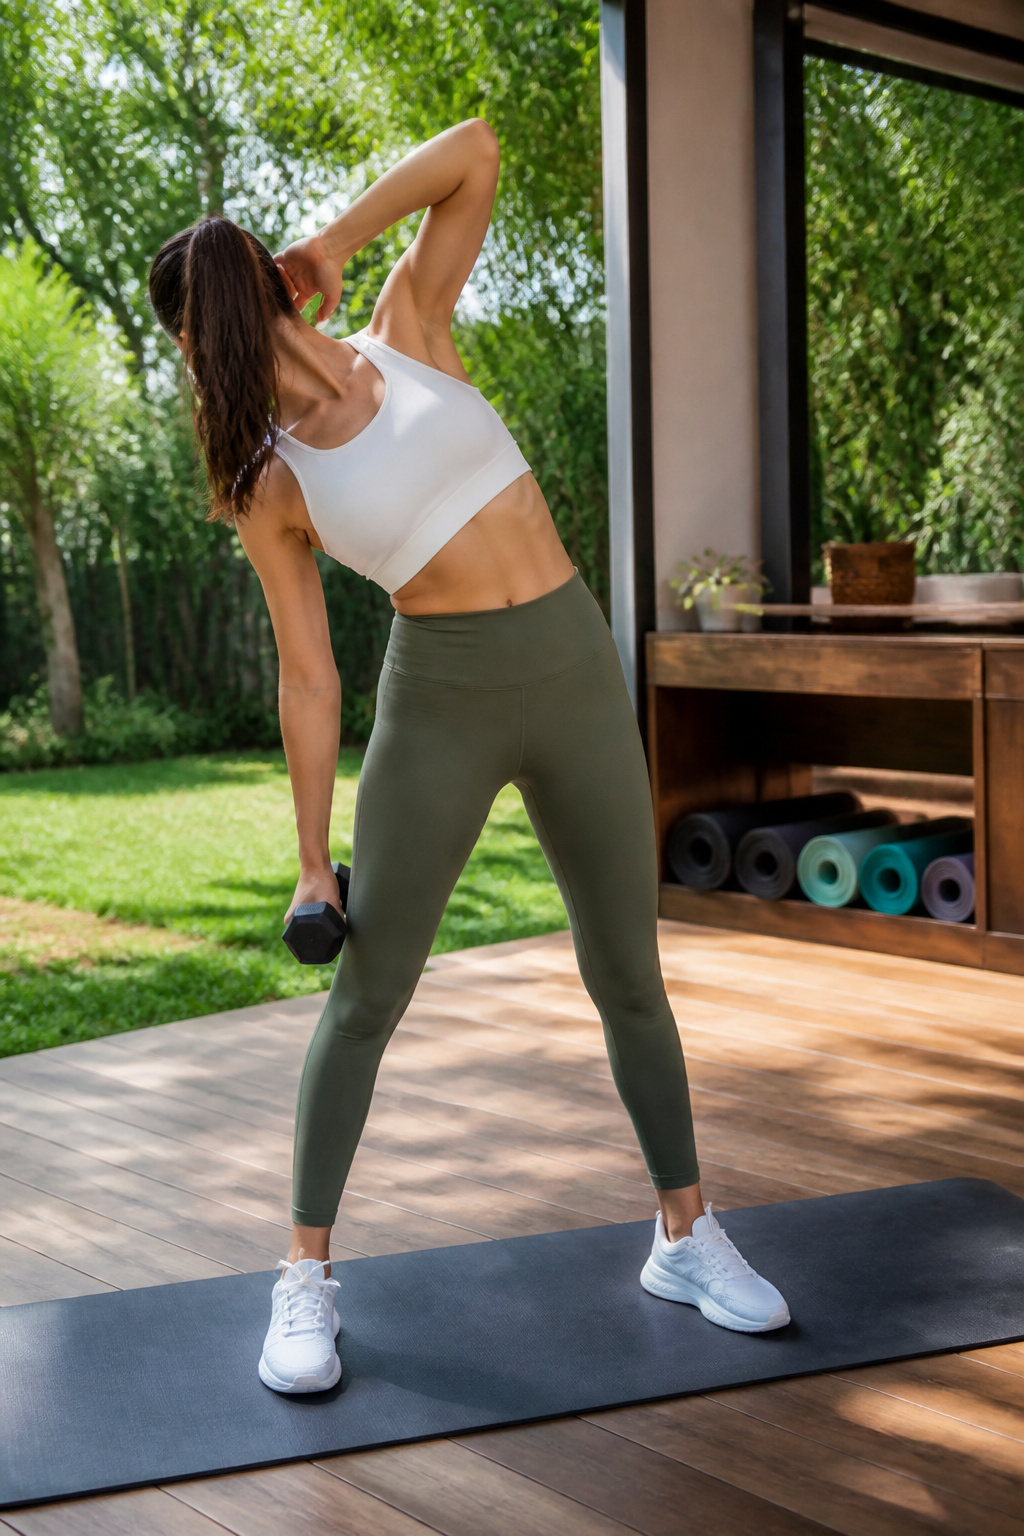
The standing oblique crunch keeps you vertical while the work hits the same side muscles that floor crunches reach. A 5- or 10-pound weight in the reaching hand adds enough load to feel the obliques engage without pulling you off balance.
What changes in the standing position is the demand on stabilizers. Your hips have to stay locked so the torso does the moving; let them shift and the crunch becomes a lean. I keep my stabilizing hand at my head, not behind it, which reminds me to keep the shoulder from creeping toward the ear.
Two ways sources describe the reach: straight down the side of the body, or across toward the opposite knee like a standing bicycle crunch. The straight side reach keeps tension on the same oblique the whole rep; the cross-body twist fires the opposite oblique to pull back to center. I use the straight reach when I want control, the twist when I want more rotation in the routine.
This fits anywhere you need a vertical option. Back trouble or limited floor space makes it a swap for side planks or Russian twists, and it layers into a standing circuit without the down-and-up transition that kills momentum between moves.
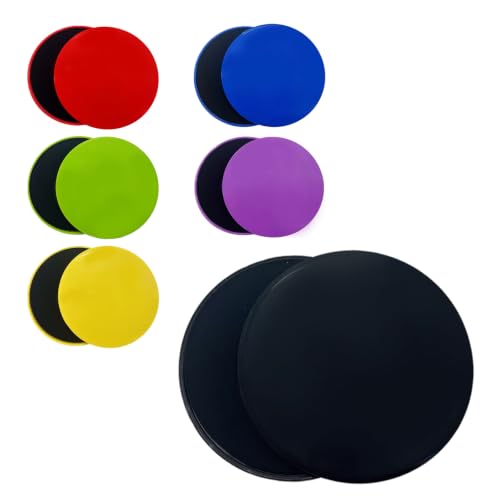
6 Pairs for Training Groups Includes 12 exercise sliders, enough for 6 users or multiple workout stations. Great for home gyms, fitness classes, Pilates sessions, school PE activities, personal trainers, and small group training.

6 Pairs for Training Groups Includes 12 exercise sliders, enough for 6 users or multiple workout stations. Great for home gyms, fitness classes, Pilates sessions, school PE activities, personal trainers, and small group training.

6 Pairs for Training Groups Includes 12 exercise sliders, enough for 6 users or multiple workout stations. Great for home gyms, fitness classes, Pilates sessions, school PE activities, personal trainers, and small group training.
10. Mountain Climbers
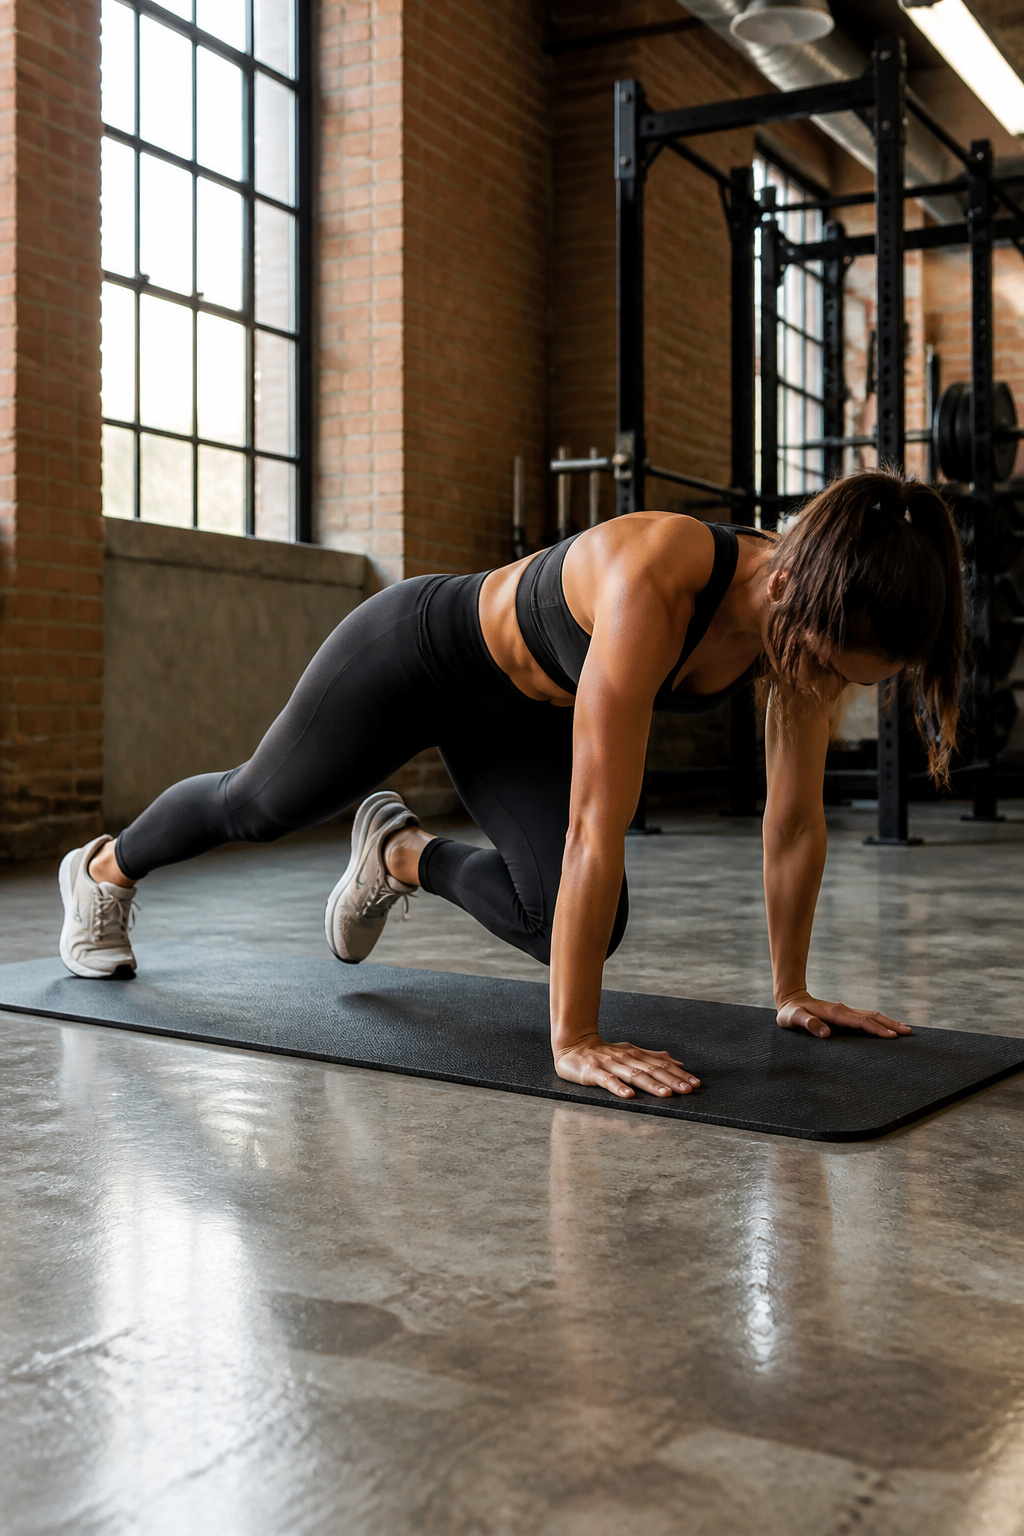
Mountain climbers sit in an awkward middle ground that most people rush through without deciding what they want from them. Go slow, driving one knee to your chest at a time with your hands stacked beneath your shoulders and your hips low, and the move reads as core strength work. Your abs have to stabilize against the leg movement, and the rounded back position keeps tension through the midsection. Pick up the pace and the same exercise flips into conditioning; your heart rate climbs, you burn through calories, and you start bridging the gap between targeted core training and the overall fat loss that actually reveals a slimmer waistline.
Foot placement matters more than most people realize. Landing too far forward loads your shoulders and lets your hips hike upward, which steals the work from your abs. Keep your hip height locked so your body stays in one straight line from head to heels, same as a plank. The knee drives in; the hip does not lift to meet it.
The real value here is that combination. Pure core work tones the muscles underneath, but spot reduction has been disproven repeatedly. You need a calorie deficit to drop fat, and a 3,500-calorie deficit burns roughly one pound of stored fat. Mountain climbers contribute to that deficit directly when you move fast enough to spike your heart rate, while still demanding core engagement that slower cardio often misses. Ten reps per leg is a solid starting point; adjust speed to match whether your session needs more strength emphasis or more burn.

💪【Precision Rotations】As one of the essential gym accessories to fine tune your six pack, this ab roller is a great tool to work on attractive, defined ab lines with precision, more challenge and depth, thanks to its slightly rounded wheel and therefore smaller surface area.
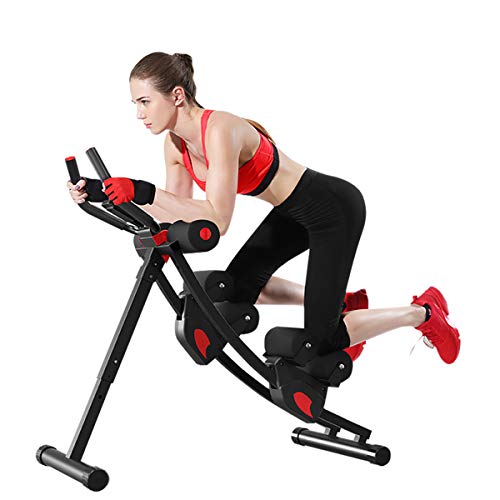
【Professional level ab/core machine】curve track & separated sliders design Involves more muscles take your ab/core workout to a higher level.

11. Reverse Lunge with Twist
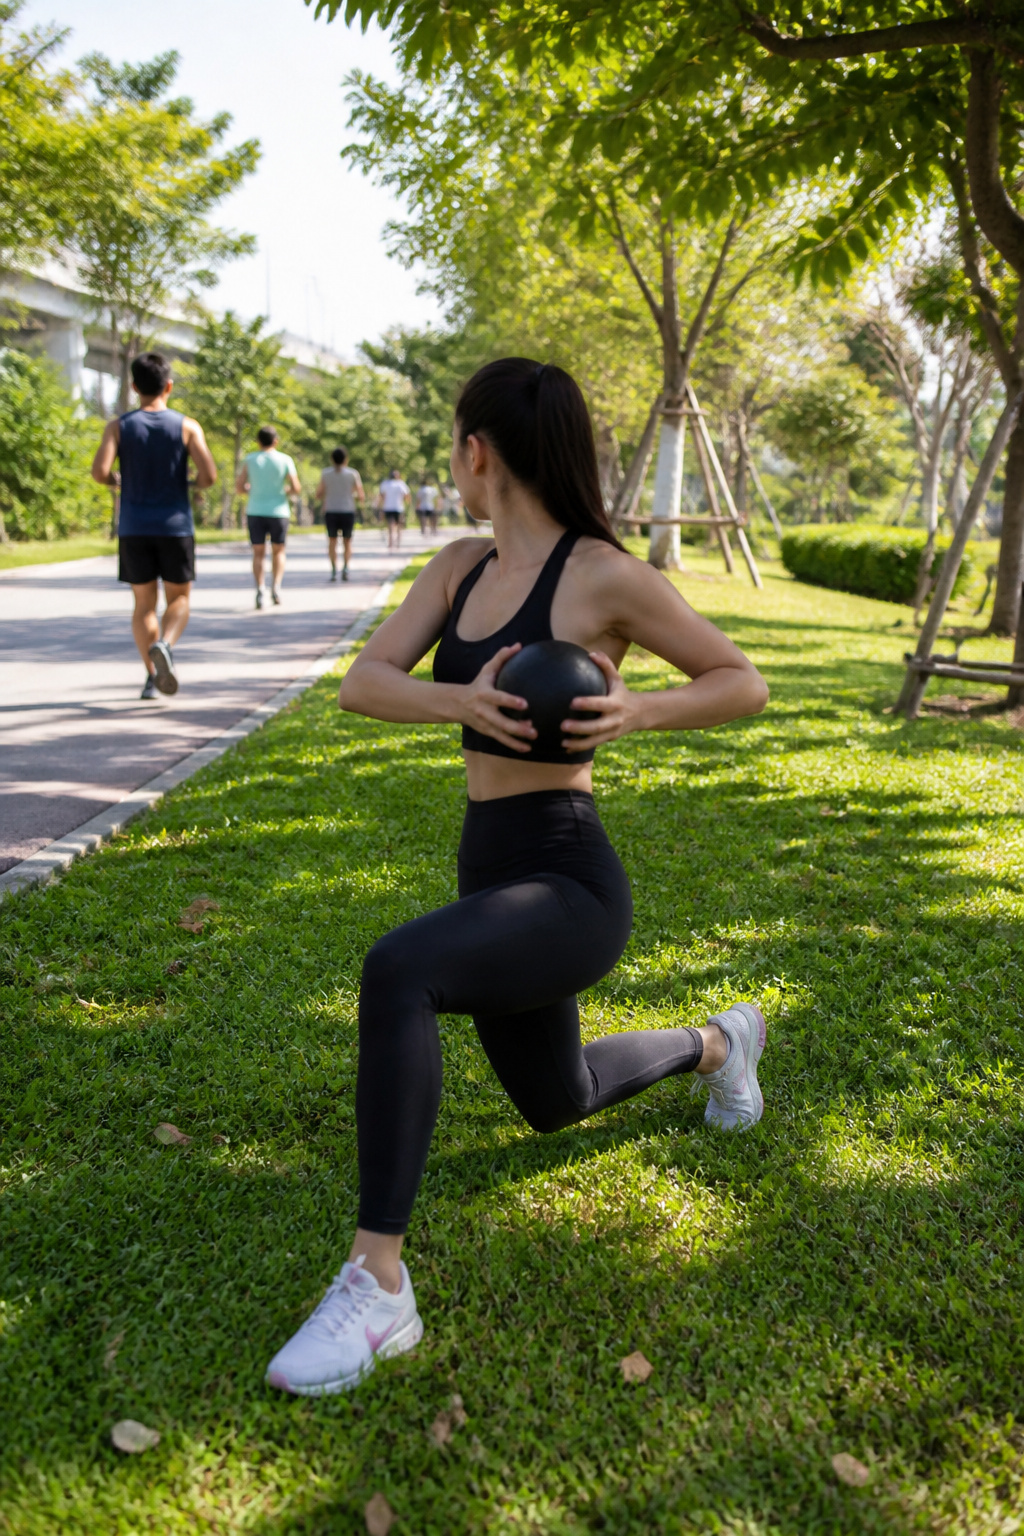
Adding rotation to a lower-body move turns the reverse lunge into something that actually trains the waist for real life. The obliques fire hardest when they have to control your torso against momentum, not when you isolate them on a mat.
Step back into the lunge first, then twist only after the back knee has settled near the floor. Twisting while still descending wobbles the hips and cheats the core. The front knee stays behind the toes, and the twist stays within the range where the hips stay square. Drive back up through the front heel.
Body weight alone is enough for most people learning the pattern. A light dumbbell held at chest height can load it once the balance feels automatic, but anything heavy pulls the shoulders forward and ruins the spinal alignment that makes this useful. Five controlled reps per leg is a solid starting point.
12. Alternating Toe Touches
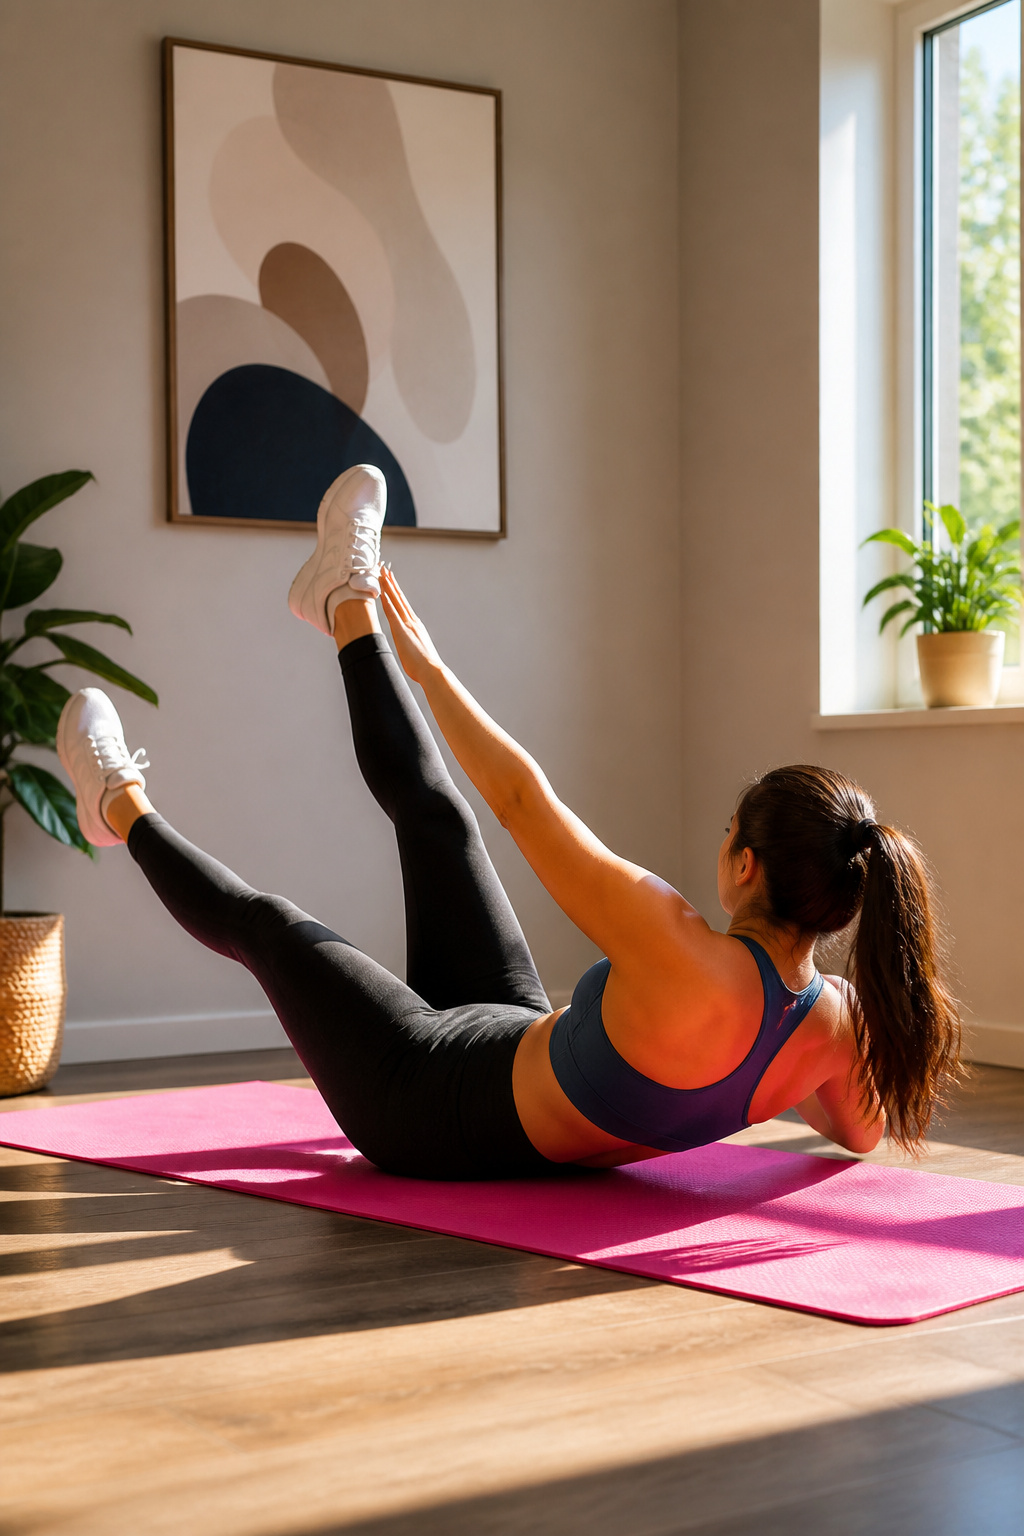
Lying on your back with legs raised to about a 45-degree angle sounds deceptively simple until you try to keep both shoulders planted while reaching opposite hand to opposite foot. The alternating toe touch works through lateral flexion, letting the obliques on each side pull the torso up rather than curling forward the way a standard crunch does. Both arms start in a T-position on the floor, and both shoulders stay down on that floor throughout the reach. This shoulder blade clearance is what separates a clean oblique contraction from a sloppy roll. Return to center, switch sides, and repeat for 10 repetitions per side. The internal and external obliques handle the twisting load, with the full range of motion doing more for waist definition than the partial squeeze of a regular crunch. Start from a neutral spine and keep the core engaged to protect the lower back.
13. Cross-Body Mountain Climbers
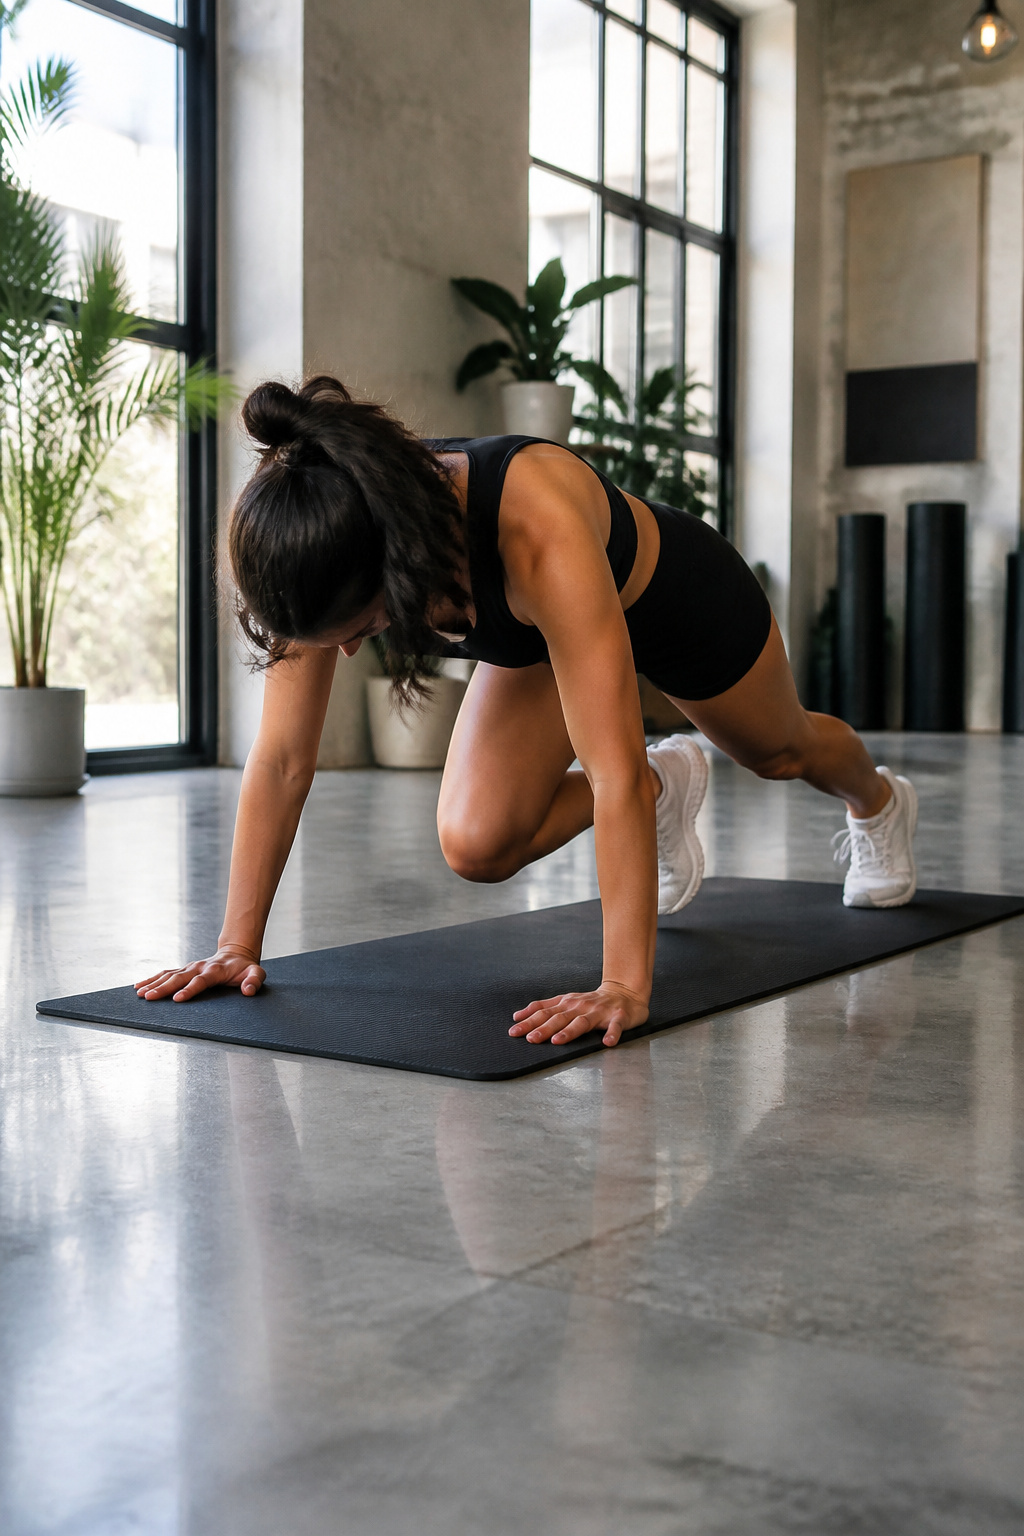
Cross-body mountain climbers pull the obliques into the work in a way standard mountain climbers barely touch. The twist happens at the hip: driving the right knee toward the left elbow, then switching, forces the external and internal obliques to control rotation while the rectus abdominis holds the plank steady. Standard mountain climbers keep the knee tracking straight forward, which keeps the emphasis on hip flexors and the lower abs without that sideways pull.
Pace matters more than most people think. Treating this like a cardio burst and speeding through the reps lets momentum do the rotation instead of the core. A controlled tempo, roughly one second to drive the knee across and another to return, keeps the obliques under tension. Ten repetitions per leg, as a common starting point, already burns if the twist is honest.
Fewer programs feature this variation because it demands more coordination and breaks the rhythm that makes standard mountain climbers a popular HIIT filler. The twist also exposes weak links: if the hips sag or the shoulders shift, the form falls apart faster, which trainers notice and sometimes avoid rather than correct. That honesty is exactly why it earns a spot in a slim waist workout.
14. T-Bar Rotations
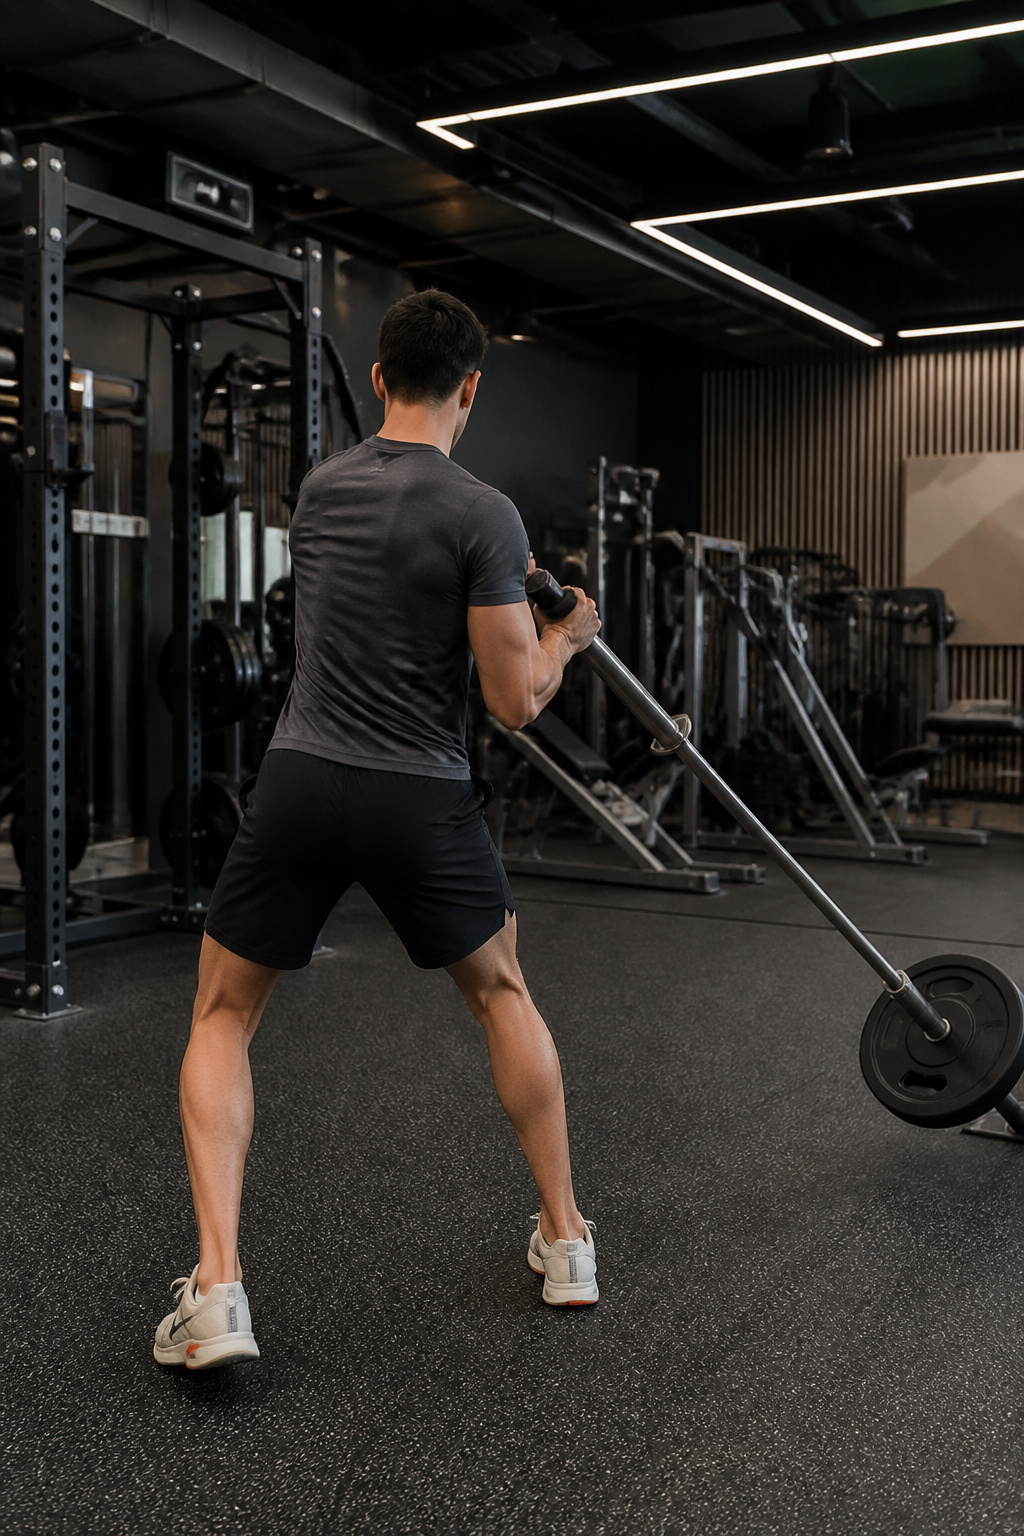
T-Bar rotations ask you to stand with feet about shoulder-width apart, grip one end of a barbell anchored in a corner or landmine attachment, and rotate the loaded end from one hip to the other. The weight travels in a horizontal arc, which means the obliques fire to control that side-to-side pull rather than just resisting forward flexion. A stance too narrow costs you balance; too wide and the rotation itself gets choked off. Most slim waist workout roundups skip this one entirely, probably because it needs equipment and a little floor space, which makes it less Instagram-friendly than a mat move you can do in a bedroom corner. That is a shame, since the standing position also recruits the glutes and lower back to keep you upright, so the core works harder to stabilize while it rotates. A standard 45-pound bar with a light plate on the free end is enough to feel the drag through the obliques; add weight only when you can keep the movement slow and the bar path level.
15. Renegade Row
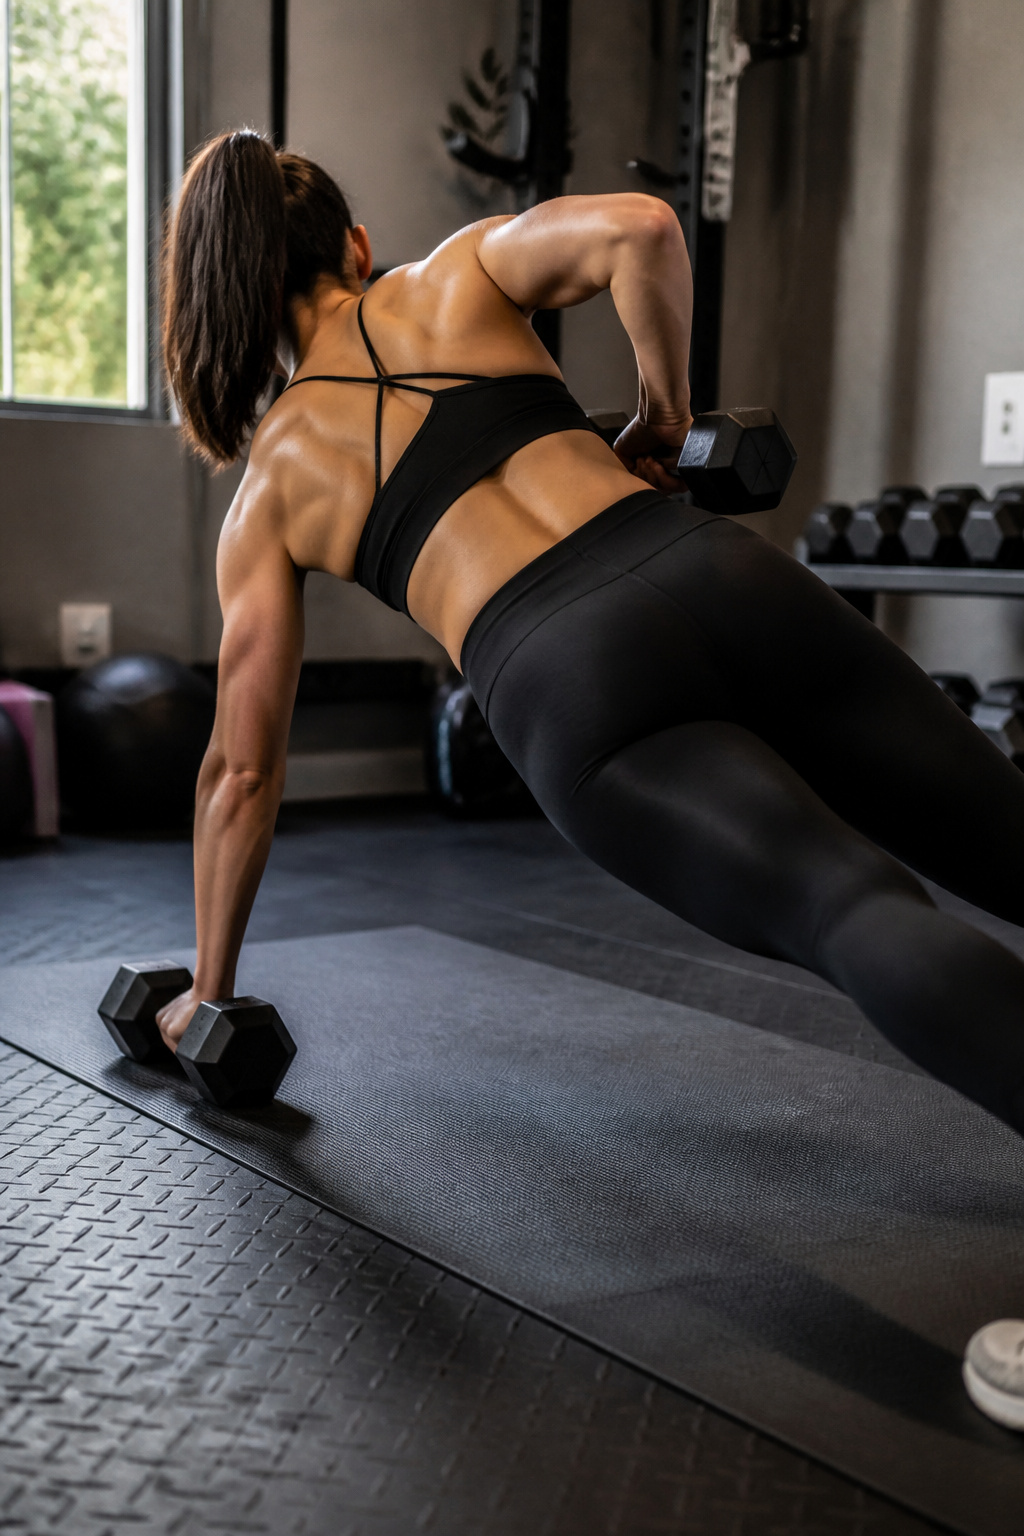
A renegade row starts in a high plank with a dumbbell in each hand, which already tells you this is not the move for beginners still finding their plank. The rowing motion pulls one weight to your hip while your feet stay wide enough to keep you from tipping, forcing your obliques to fight rotation through every rep. That anti-rotation work is what earns this exercise its place in a slim waist workout; the core stays braced against movement rather than creating it, building the kind of stability that makes the midsection look pulled in even at rest.
Kettlebells work here, though their height off the floor can narrow your base and make the balance harder. Dumbbells sit lower and feel more forgiving for most. Hip stability is the limiting factor: as soon as your hips rock to help the row, the waist tension leaks out and the shoulder starts compensating. I drop weight the moment I feel that shift, because a lighter load with level hips beats a heavy one that twists your torso.
Of everything in this list, the renegade row has the least research backing it specifically for waist shaping. The plank and the row each have plenty on their own, but studies combining them are sparse. The logic holds, and the demand on your obliques is immediate and real when you do it right. Just know you are trusting the mechanics more than the data.
Overall Fat Loss
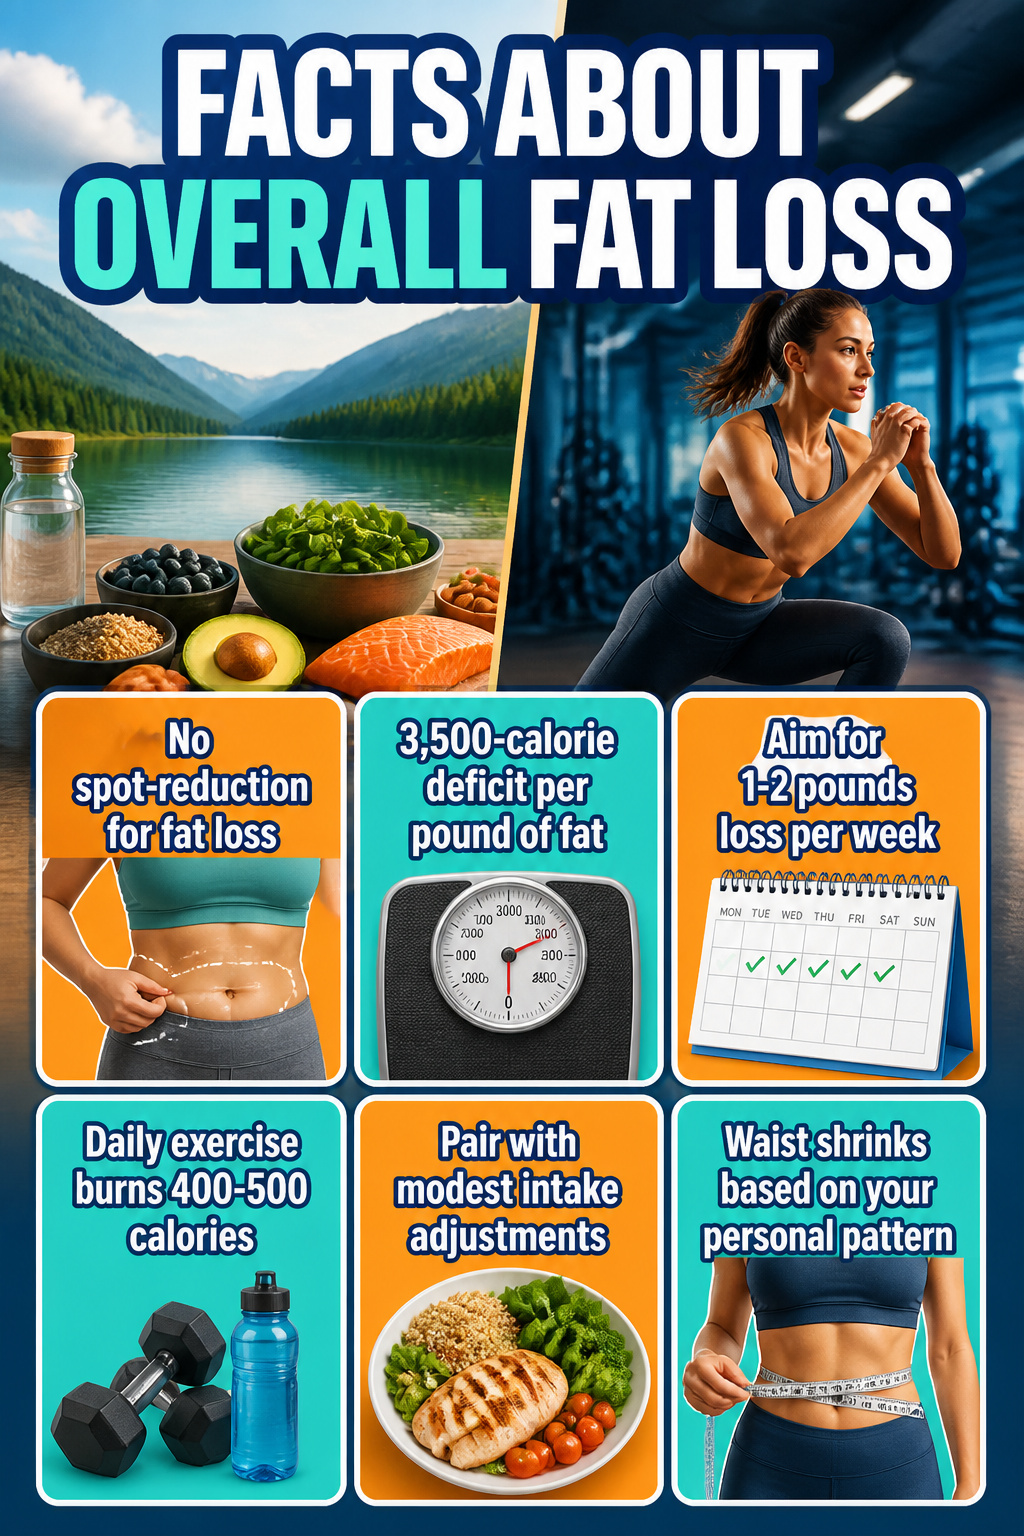
A smaller waistline starts with a hard truth: the body does not spot-reduce. Years of crunches and side bends will strengthen the muscles underneath, but the fat layer stays until overall body fat drops. The 3,500-calorie deficit per pound of fat is the number that actually matters, and most people can sustain a rate of 1 to 2 pounds per week without crashing their energy or metabolism. Rush it faster and you are mostly losing water and muscle, not the adipose tissue around your middle. Daily exercise burns roughly 400 to 500 calories for most women in this bracket, paired with modest intake adjustments to hit that 750-calorie daily gap that lands you near a pound every 4 to 5 days.
Fat loss does not work through spot-reduction. You can’t choose where you lose fat from; that largely comes down to genetics and how your body works.
Your waist will shrink last or first depending on your personal pattern, not your will. The payoff comes from accepting the process: nutrient-dense eating, mixed training, and patience measured in weeks, not days.
Core Strength and Posture
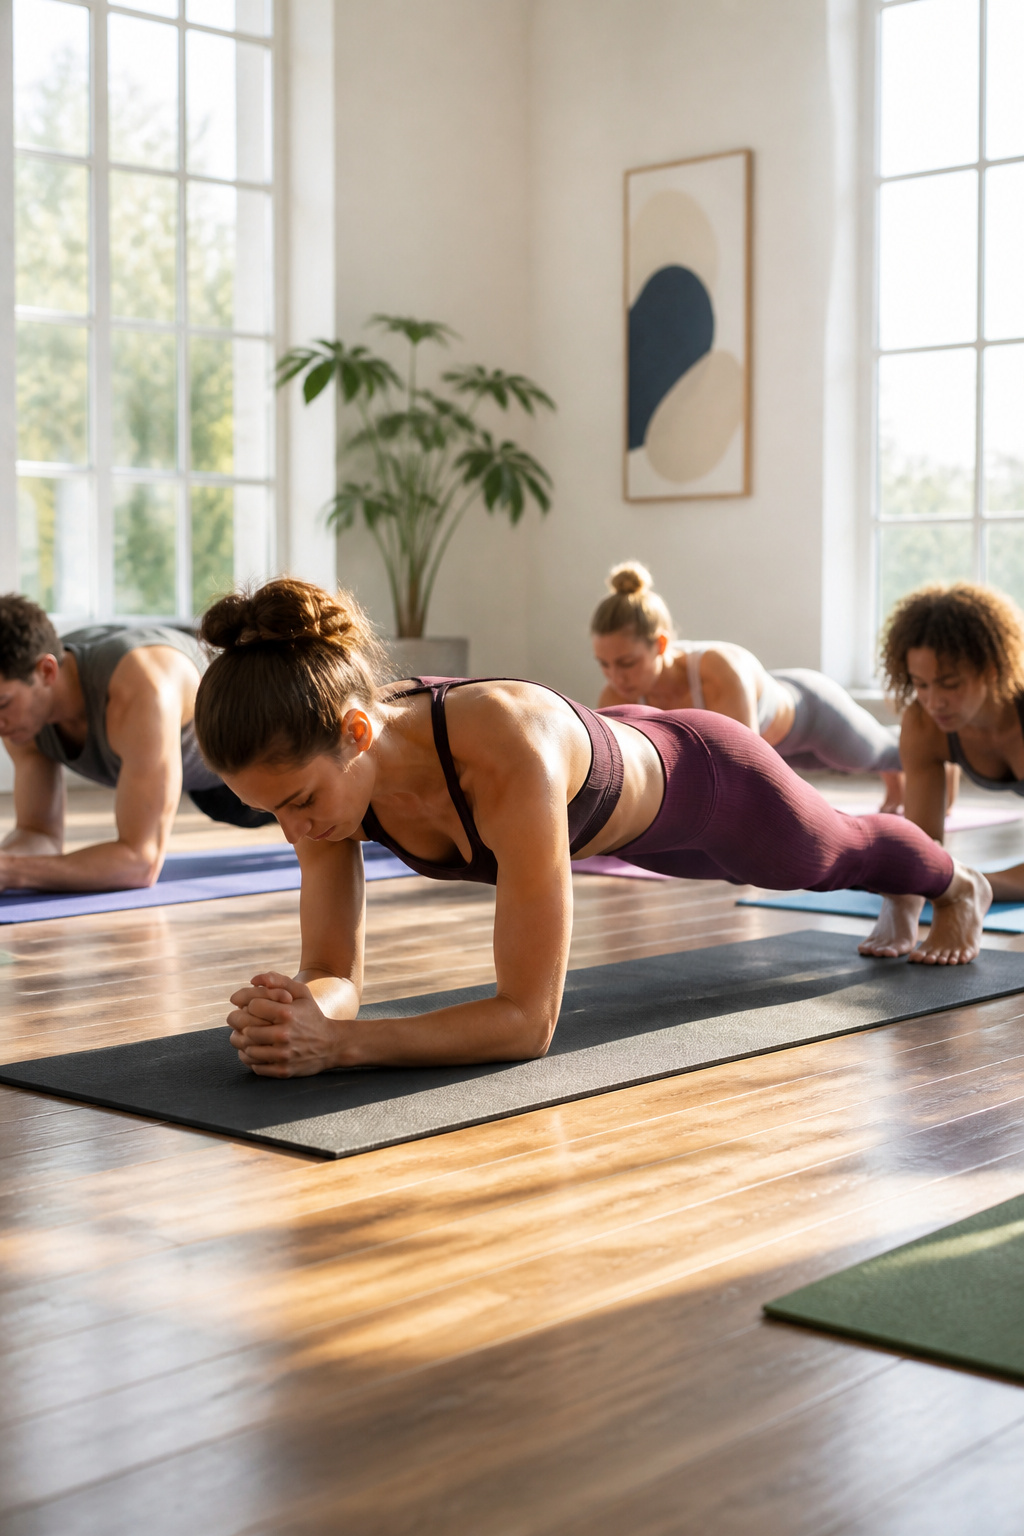
A stable core pulls the waist in before any fat loss shows on the scale. I noticed this myself after about three weeks of consistent plank work: standing in front of a mirror, my lower abdomen looked flatter not because I’d lost inches, but because I wasn’t letting my pelvis tilt forward anymore. The transverse abdominis, that deep corset muscle, keeps the midsection pulled tight against the spine when it’s trained to fire properly.
The oblique-focused moves in this routine matter for more than aesthetics. Internal and external obliques control rotation and side bending, which means they protect the lower back during ordinary lifting. Squatting to grab a heavy box, twisting to lift a toddler out of a car seat: these recruit the same muscle groups as the hip dips and standing crunches listed above.
Posture changes show up fast. Within two weeks of regular core work, most people notice their shoulders sitting back without effort and their rib cage no longer flaring forward. The waistline looks narrower in clothes simply because the torso has stopped collapsing into that familiar slump. Visible fat loss takes months; this structural shift takes days.
How Often to Do These Exercises
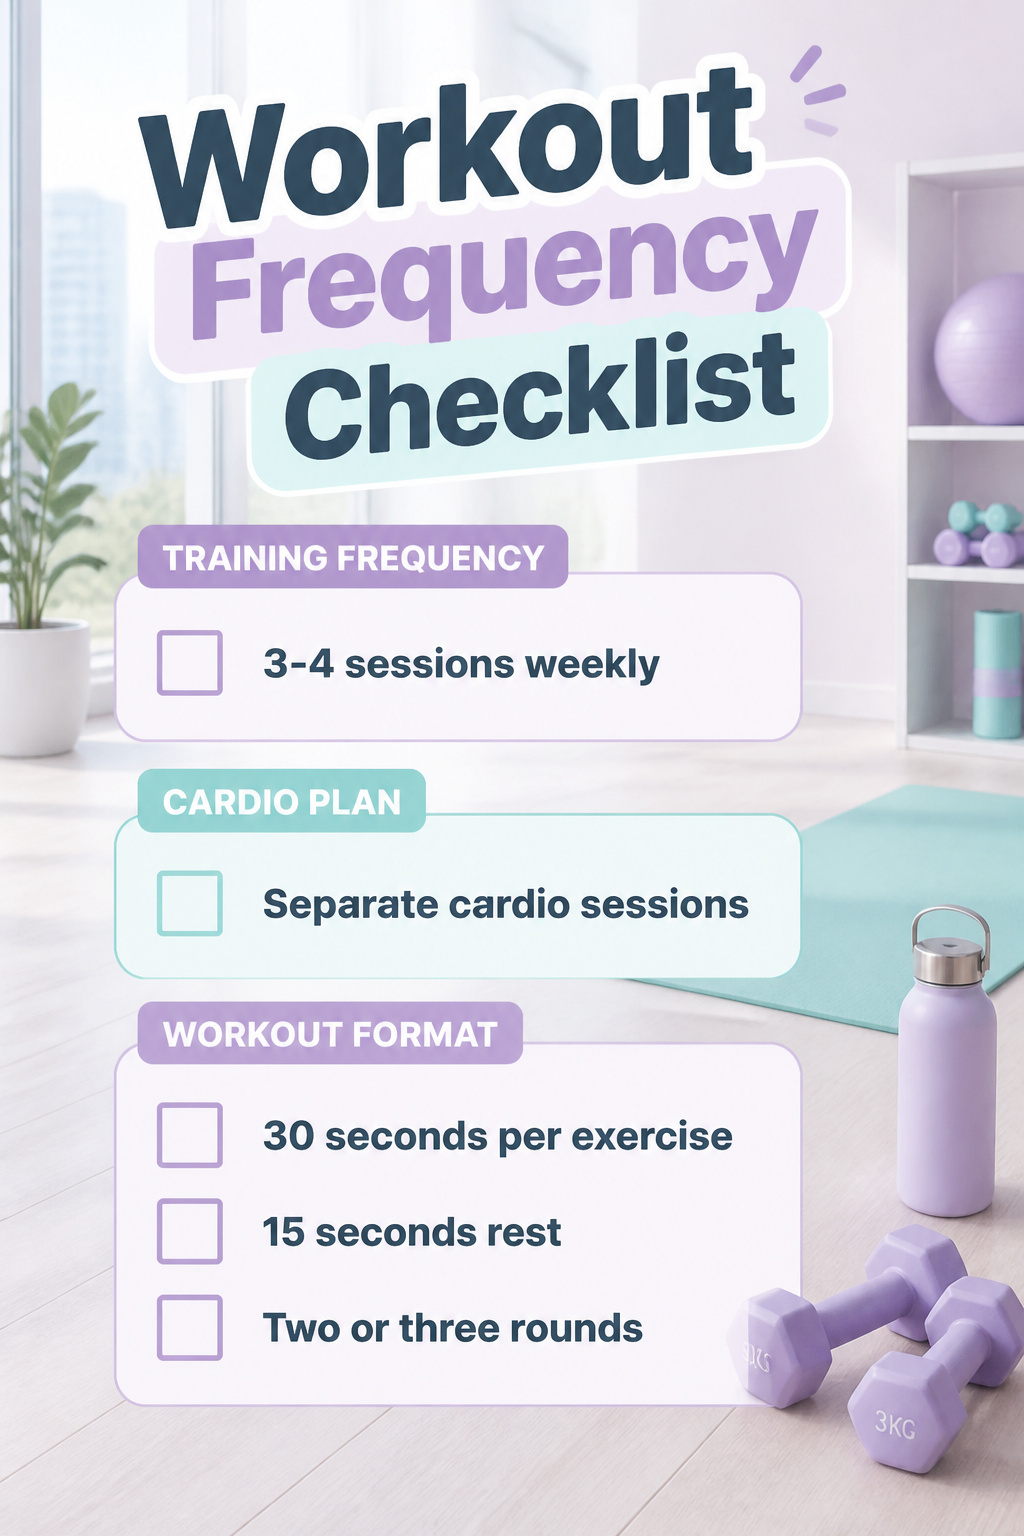
Three to four sessions weekly is the workable middle ground that lets the muscles recover while the habit sticks. Cardio belongs in the same week, not the same hour; two or three separate sessions on the elliptical, a HIIT class, or even a hard treadmill interval block will handle the fat loss that ab work alone cannot. The format that fits into a lunch break is 30 seconds to 1 minute per exercise, 15 seconds rest, run through two or three rounds depending on what the day allows.
A week might look like Monday and Thursday for the core circuit, Tuesday and Saturday for a 30-minute cardio session, with the other days left alone or used for walking. That spacing keeps the waist work from turning into background noise. Visible change shows up somewhere between six and twelve weeks; the ones who quit at four are usually the ones who expected the mirror to move faster than the calendar.
What to Eat
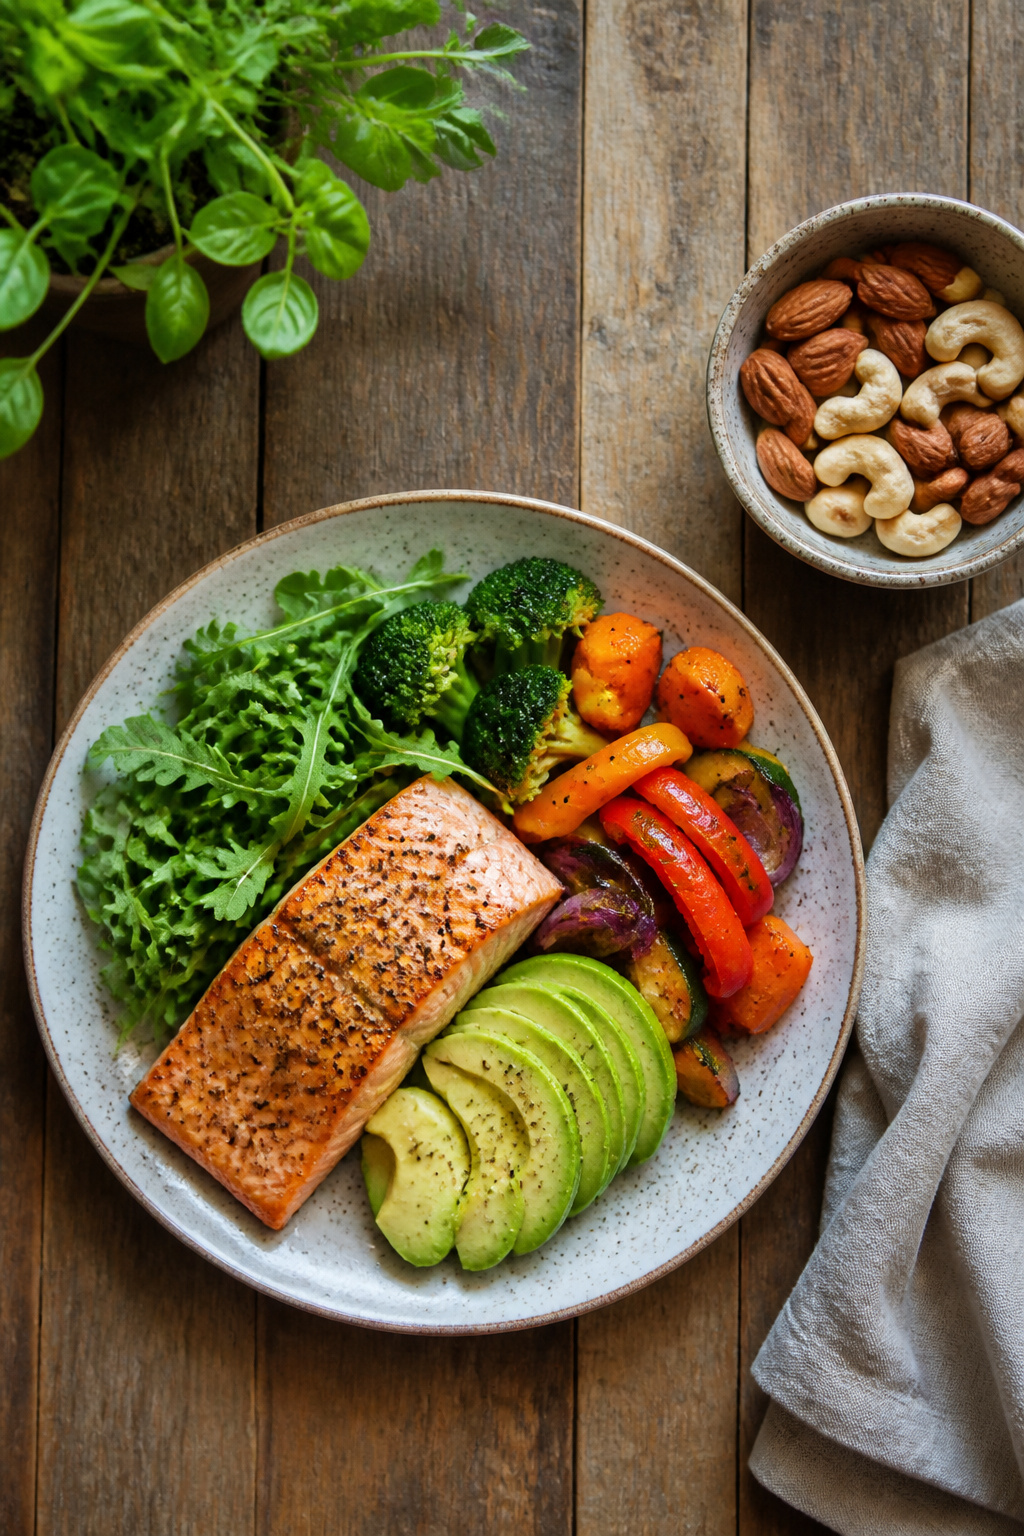
Nutrient-dense foods do more for a slim waist workout than any amount of crunches alone. The American Heart Association has tied excess midsection fat to heart disease risk even at a healthy BMI, so what lands on the plate matters as much as what happens on the mat.
Soluble fiber, vitamin D, and probiotics from fruits and vegetables support the kind of weight loss that actually shrinks the waistline. Refined carbohydrates, sugar, and processed foods do the opposite, spiking calories and slowing fat loss. Healthy fats from fatty fish, avocadoes, almonds, and cashews feed the body without the inflammation or digestion load that processed oils bring.
Sodium is the hidden waistline saboteur. Salt drives water retention, which can puff the midsection and mask real progress. On labels, grams of added sugar and milligrams of sodium deserve more attention than calorie counts alone. Skip anything where sugar sits in the first three ingredients or where sodium climbs past what a single meal should carry.
Frequently Asked Questions
How can I lose weight around my waist?
You can’t spot-reduce fat from your waist alone. The body pulls fat from everywhere based on genetics, not exercise choice. A 3,500-calorie deficit burns roughly one pound of stored fat, and most people can sustain 1 to 2 pounds of loss per week by pairing daily exercise with modest intake cuts. Core exercises strengthen the muscles underneath, but the visible slimming comes from overall body fat dropping.
How long will it take to notice a slimmer waist?
Many people notice changes within 6 to 12 weeks of consistent effort. The article notes that posture improvements from core training, like a flatter lower abdomen from transverse abdominis engagement, can show even before scale changes. Actual fat loss timing depends on your personal pattern of where the body sheds first, which is genetic and not something you control.
Are waist slimming exercises safe for all fitness levels?
Yes, every move in this routine can be scaled. Beginners can keep feet on the floor during Russian twists, hold shorter plank intervals with strict form, or start bird dog without the overhead arm reach. New mothers should wait on bicycle crunches until baseline abdominal strength returns after pregnancy. The dead bug and standing oblique crunch are especially forgiving entry points.
Can I combine these exercises with cardio for better results?
Yes, and you should. The article stresses that core work tones the muscles underneath but only overall fat loss reveals them. Mountain climbers bridge both goals, acting as core strength work at slow tempos and calorie-burning cardio when sped up. For the full routine, aim for 2 to 3 rounds of 8 to 12 reps per move, three to four times weekly, alongside regular cardio sessions.