The looks here run from a single swipe of metallic shadow to rhinestones set one at a time with tweezers, and the one that fits depends on how much time you have before you leave the house.
A quick morning suits a classic winged liner or one bold shade; a free evening suits the fine-tip work of illustrated eye art or the gems around the eyes.
1. Metallic and Shimmer Eyeshadows
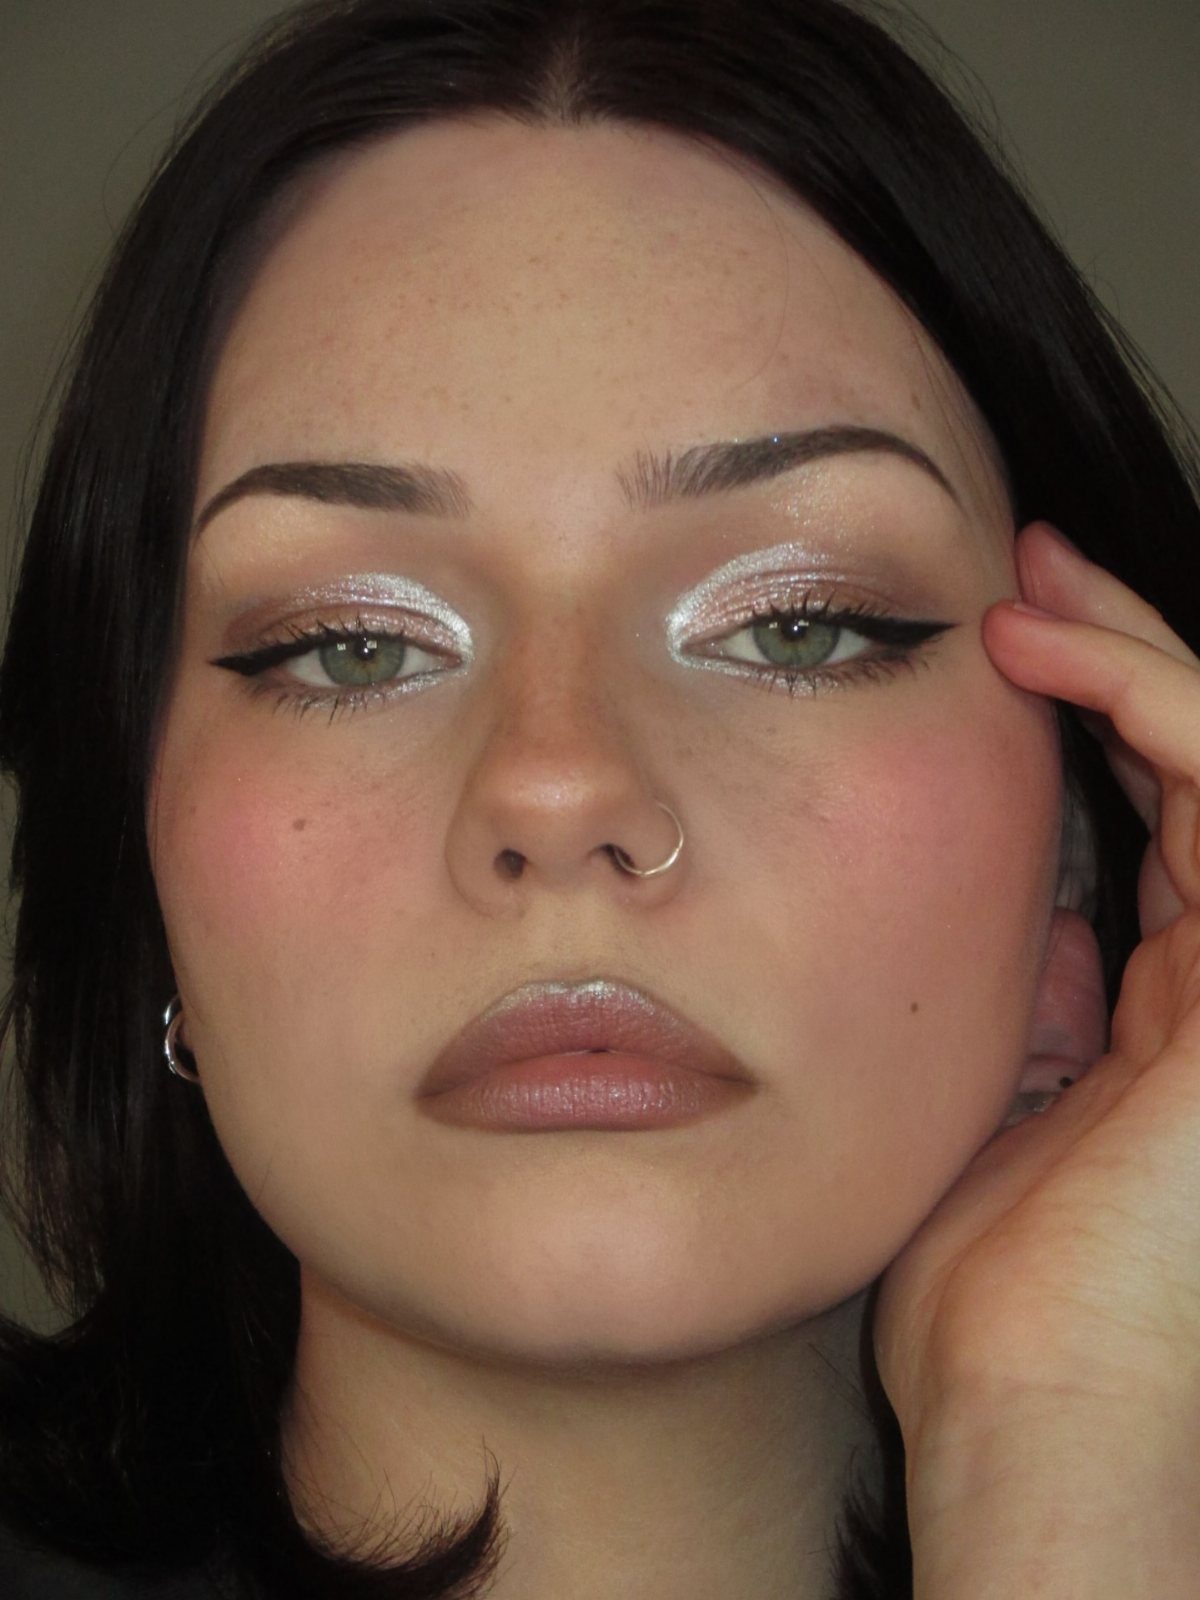
The metallic lid does the work, so the liner can stay simple.
For a finish this reflective, I’d press the shadow on using a finger or a damp brush rather than sweeping it dry. Pressing keeps the shine concentrated right where you put it.
Shimmer also catches every crease, so smooth the lid first.
2. Neon Eyeshadow
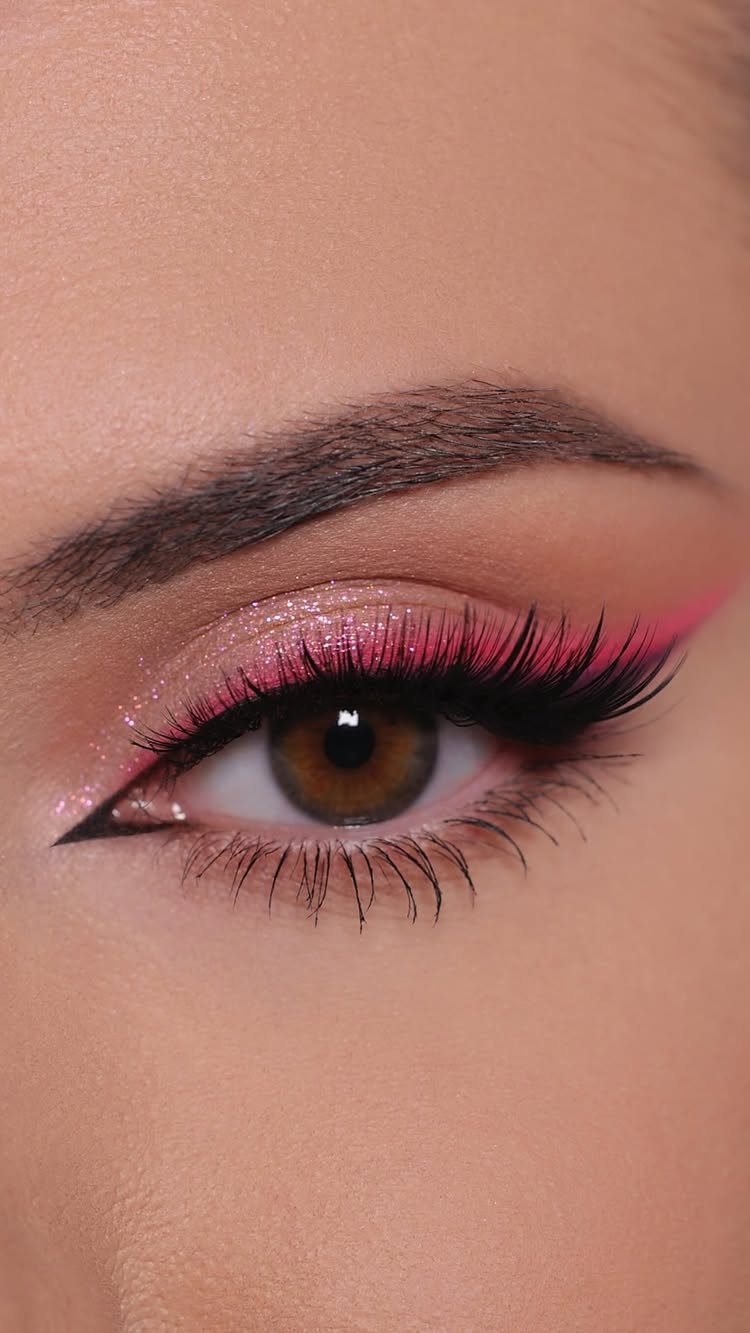
Neon pink asks for a plain supporting cast: defined brows and long lashes, with nothing else competing. Pick one bright shade and repeat it in the liner so the color looks planned.
A white or light base under the pigment makes the color read brighter. Without it, neon tends to look dull.
This look suits a night out better than a workday. Brights do show every uneven patch, so soften the edges well.
3. Floating Eyeliner
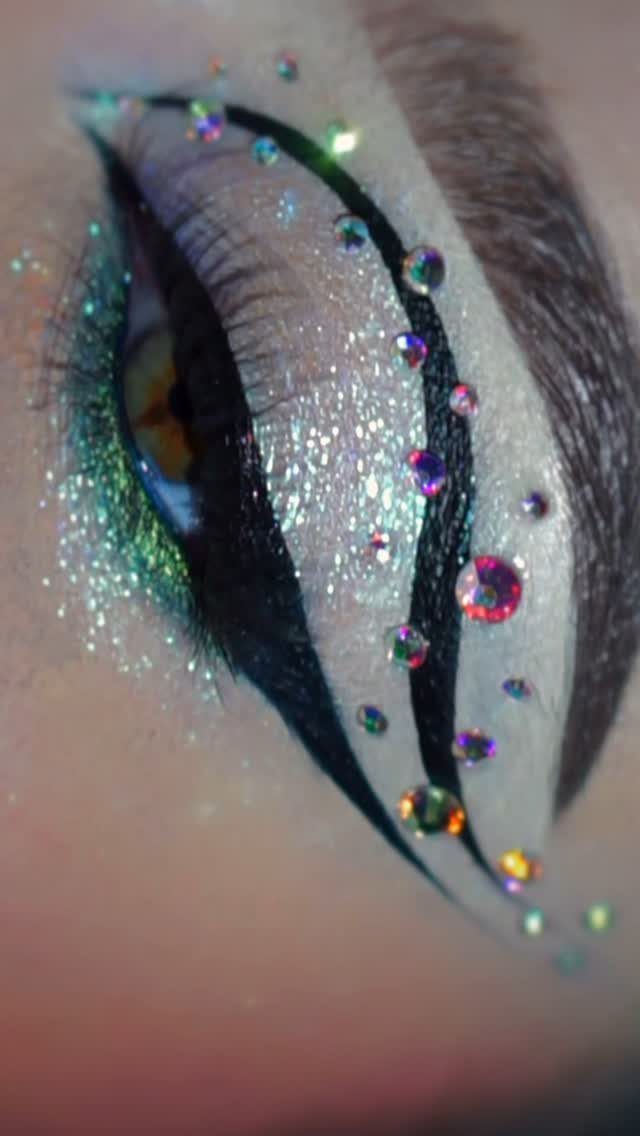
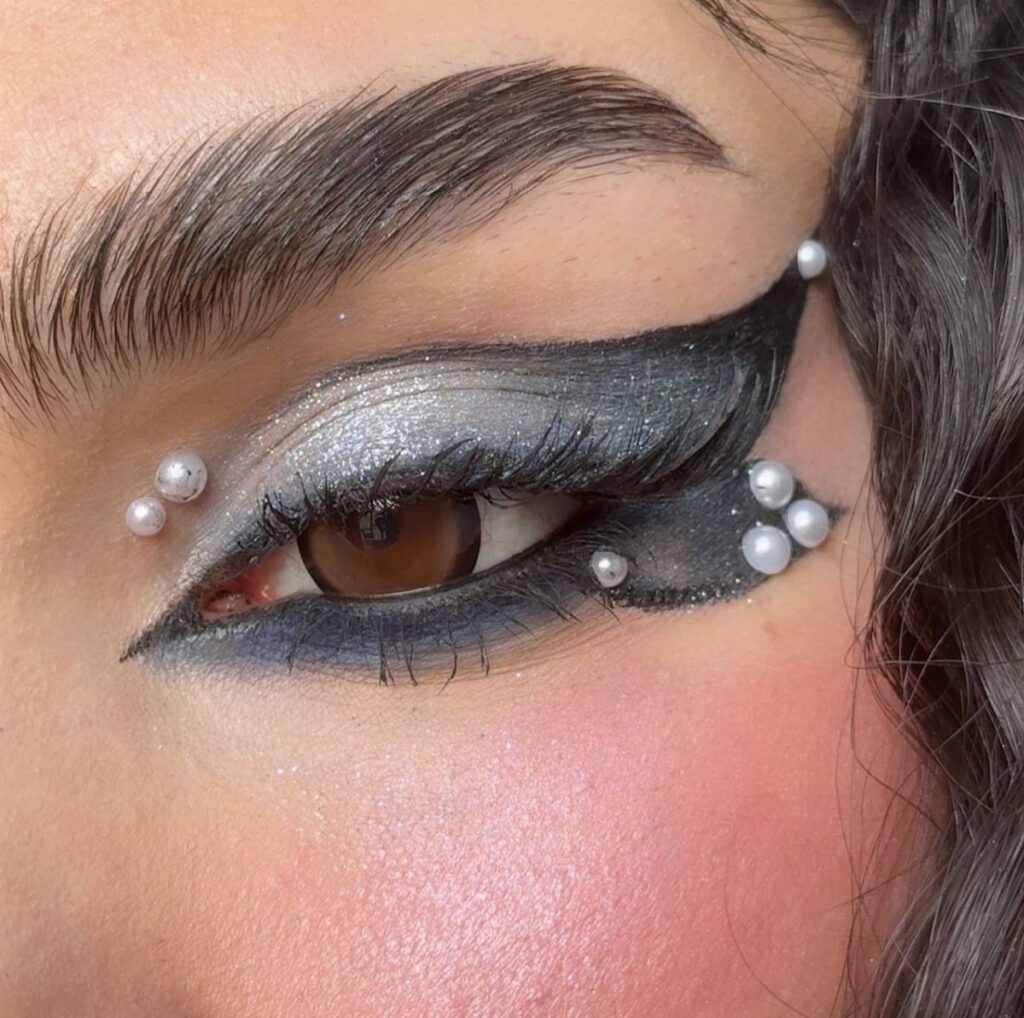
Floating liner sits above the crease instead of hugging the lash line, which leaves bare lid between the line and the lashes. Filling that gap with silver shimmer, as here, keeps the look finished rather than empty.
A liquid pen with a fine tip gives the cleanest line. Draw it lightly first; a shaky floating line has nowhere to hide.
Rhinestones are an optional add-on, not a requirement. Skip them if office-friendly is the goal.
4. Lower Lash Line Cat Eyes
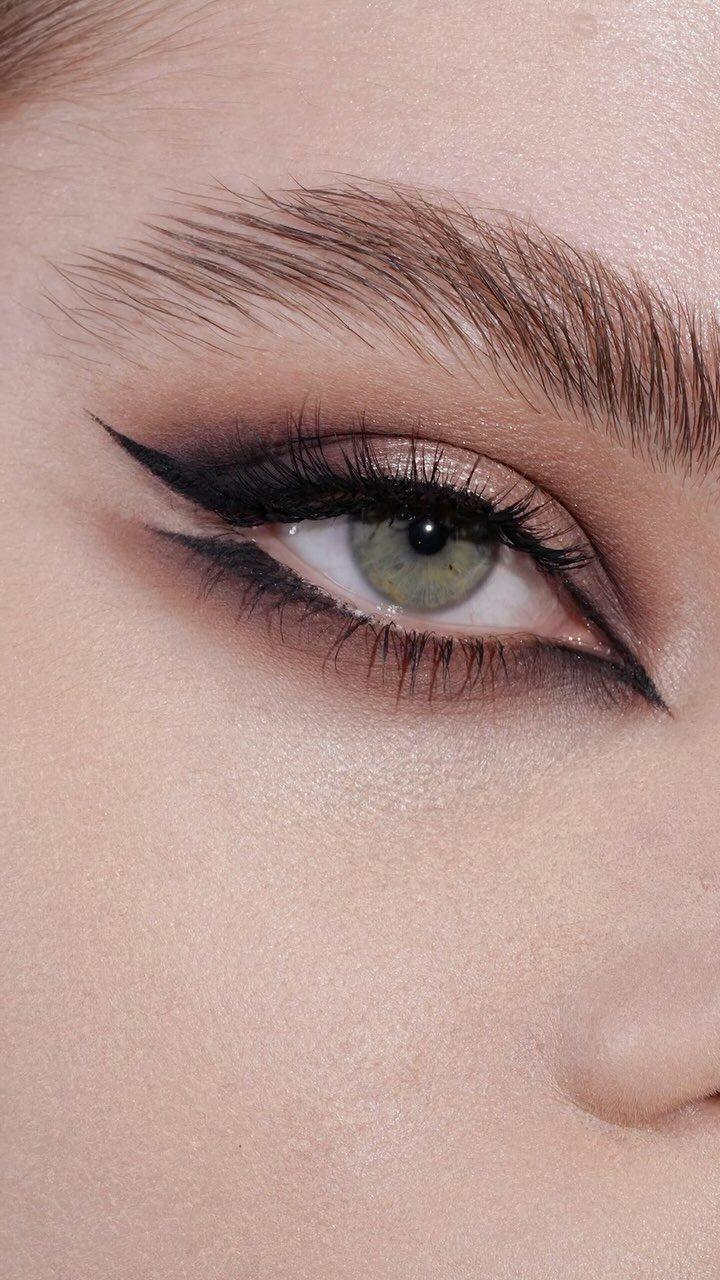
Liner on both the upper and lower lash lines turns a standard cat eye into something heavier and more dramatic. Brown shadow along the lower lash line softens the look, so the black wings don’t turn harsh.
Draw the upper wing first, then angle the lower one to meet it. Matching the two angles matters more than making either one long.
I’d choose a pencil for the lower line, since it’s easier to control near the waterline. A tissue tucked under the eye catches smudges.
5. Rhinestones and Gems Around the Eyes
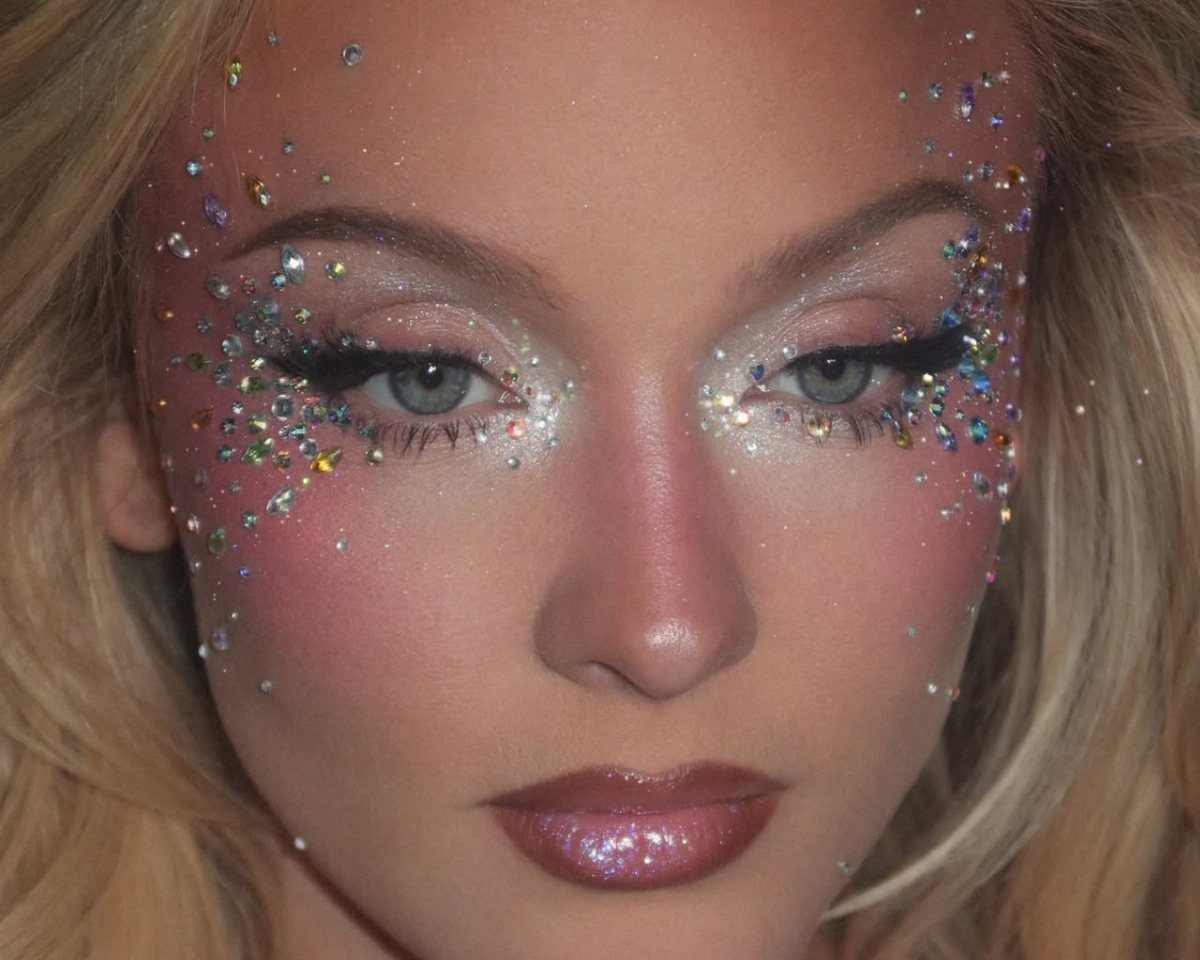
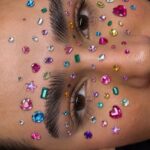
Gems work best when they are treated as the main event and everything else on the face stays quiet. In this look the stones sit around the eyes and cheeks, and a shimmering lip echoes the sparkle without adding more.
Use a lash glue or adhesive made for skin, and press each stone into place with tweezers. Place the largest ones first, then fill the gaps with smaller ones.
Expect to be careful: they’re a night-out look, and they won’t survive a face wash without some effort.
6. Classic Sharp Winged Eyeliner

Sharp black wings never really leave, and the reason is how little they ask of your other features. Groomed brows and a bare lid are enough.
Start the wing by angling a line from the far edge of your eye toward the end of your brow. Then connect it back to the lash line and fill in the triangle.
Tape or a card edge helps with a crisp point. I prefer a felt-tip liquid liner here, because it gives the sharpest edge and the deepest black.
7. Smoky Grunge Eyes
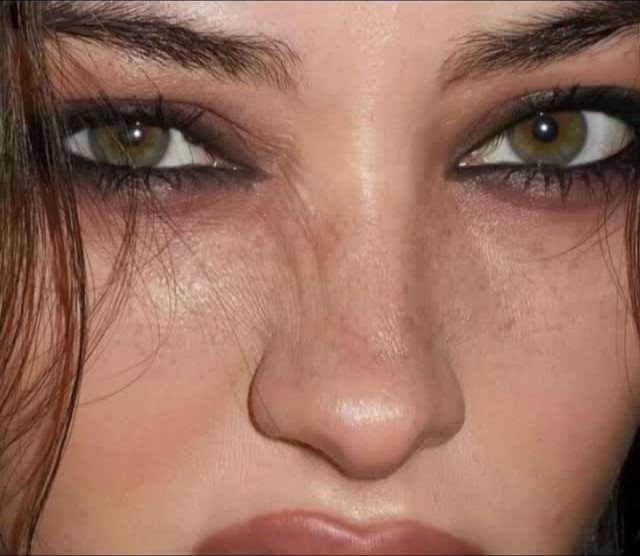
Smudged brown and black liner, blended into shadow until no edge is left, is what makes grunge eyes read as lived-in rather than messy. Brown softens the black, so the smoke looks warm instead of flat.
I’d use a pencil on the lash line and rub it out with a small brush or a fingertip right away, while it’s still soft. Press shadow over the top to lock the smudge in place.
Keep the skin and lips plain. The eyes are already doing the talking.
8. Bold Colorful Winged Liner
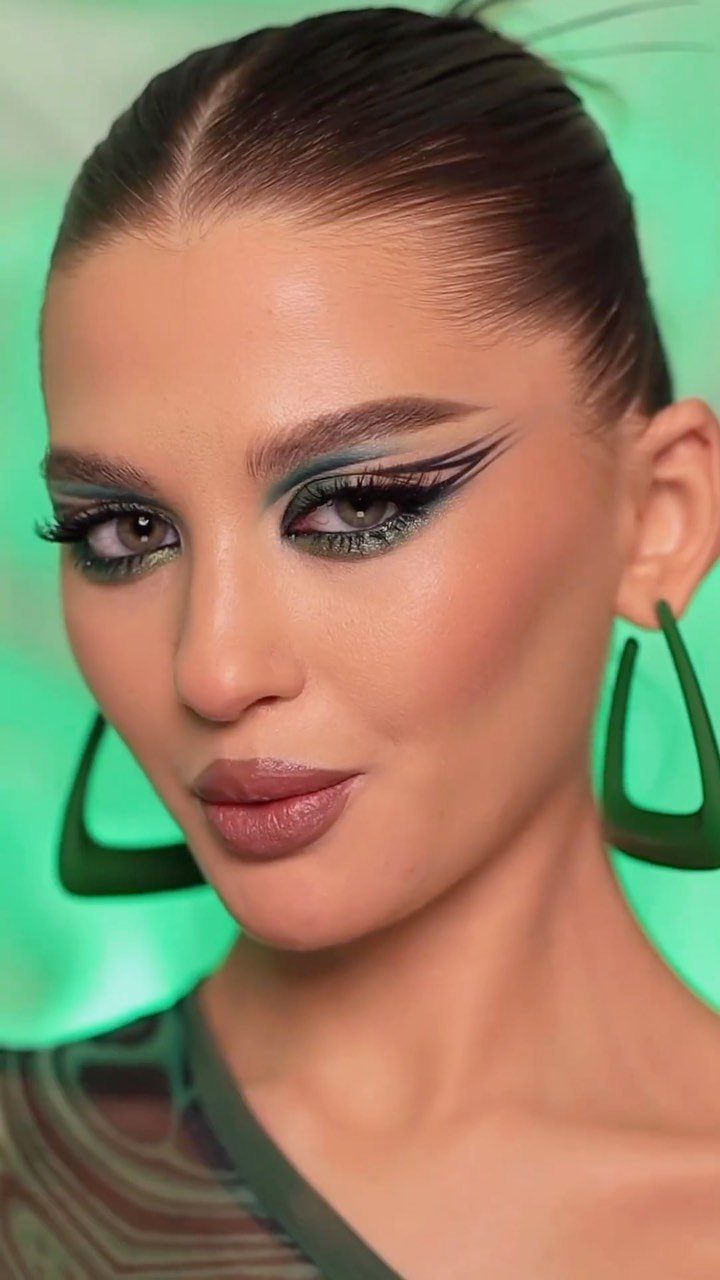
Green liner works as the color statement, and the wing is where it shows. A matching earring and background are optional; one repeated shade is what makes it look chosen.
For a color this bold, liquid or gel liner lays down the most intense, even pigment, and pencils tend to look streaky by comparison.
Pigment tends to look patchy on oily lids, so I’d set the lid with a thin layer of powder first.
Draw the wing in short strokes rather than one long sweep. Wipe mistakes with a cotton swab dipped in makeup remover.
9. Illustrated Eye Art Designs
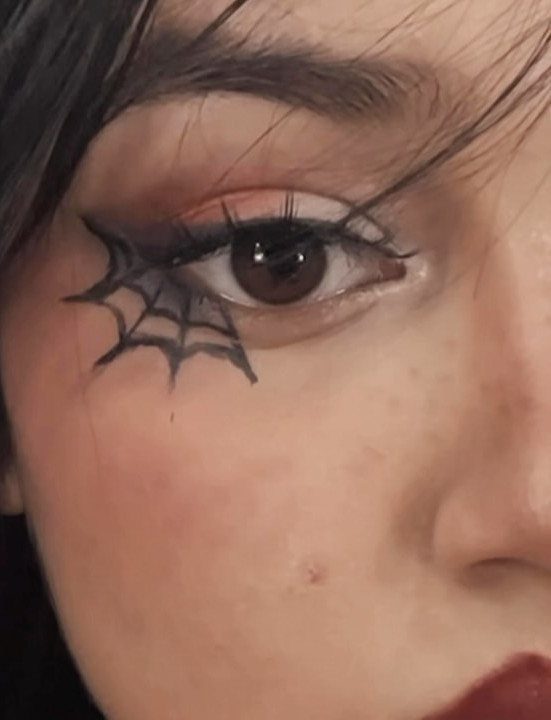
A spiderweb drawn outward from the outer corner turns the liner into illustration. Black on a reddish-brown lid keeps the web readable without extra color.
Sketch the main lines first, fanning from the corner, then link them with curved strokes that dip toward the center. A fine-tip liquid pen suits this far better than a pencil.
Go slowly and lightly. Fine detail takes patience, so this is a look for a free evening, not a rushed morning.
10. Butterfly Wing Eye Makeup
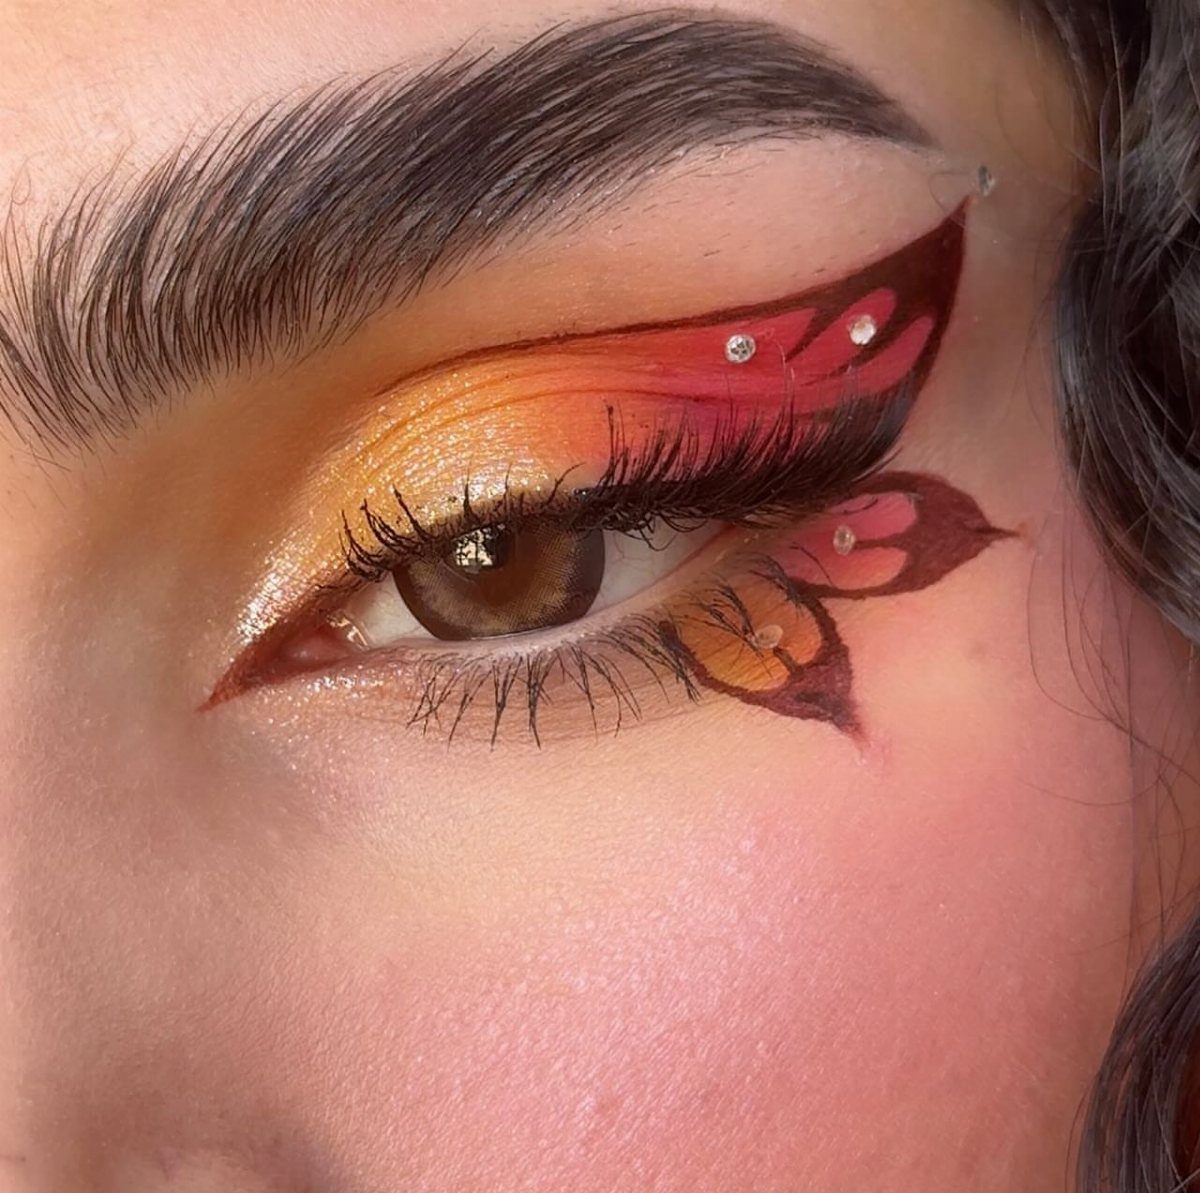
Butterfly wings in orange, red, and yellow work because the colors blend into one another like a gradient, with the shape doing the rest. Small rhinestones and long lashes finish it.
Map the wing outline in the lightest shade, yellow, then pack orange and red toward the outer edge. Blend only where the colors meet, so the shape stays clear.
Add the stones last, with skin-safe adhesive, and keep the lashes the only other extra.
Makeup Application Techniques
Primer is the step that decides how long a look lasts. A thin layer on the lid gives shadow and liner something to grip, so colors stay put instead of creasing.
Build color in layers rather than packing it on in one pass. Start light, add a second shade, and blend only where the two meet.
Blending is what separates a finished look from a messy one. A clean, fluffy brush with nothing loaded on it softens any hard edge in seconds.
Curl your lashes before mascara, and use a volumizing formula if you want the eyes to hold up next to bold color. Matte and shimmer textures in the same look add depth, so keep one of each on hand.
Cream shadows suit a painterly, color-forward finish: press them on with a fingertip and blend the edges outward.
Eco-Friendly Products
Many brands are shifting toward sustainable packaging and ingredients, and that shows up on the eye-makeup shelf too. You can use that shift to shop smarter.
Read the ingredient list the way you would for skincare, and look at the packaging as well. Refillable or simpler packaging is a sign a brand is working on the issue, not just talking about it.
Judge any "green" product on how it performs first. A liner that smears by noon wastes the product and the planet’s effort alike.
Swap one item at a time as you run out of old ones. That keeps your routine steady and lets you test each new formula on its own.
Seasonal Color Trends
Seasons nudge eye color choices, and a simple rule works: brighter shades for summer, warmer tones for fall.
For summer, pick one vivid shade and keep the rest of the face light, so the color is the focus. Bright lids are no longer just a warm-weather move, though, so feel free to wear them year-round.
For fall, move toward warmer tones and lean on matte or soft shimmer textures. They sit well against deeper lip shades and sweater-weather skin.
Rotate shades by season rather than rebuilding your whole kit. One new bright and one new warm shade cover most of the year.
Frequently Asked Questions
What makeup is used around the eyes?
Eyeshadow, eyeliner, and mascara are the core products. Primer goes on the lid first so shadow and liner don’t crease, and a curled lash line plus a volumizing mascara helps the eyes hold up next to bold color.
Cream shadows, pencils, liquid pens, and skin-safe adhesive for gems round out the extras.
What are some good summer makeup looks?
For summer, I’d choose a single saturated color, like neon liner or a bright shadow wash, and leave the skin and brows quiet so the eye gets all the attention.
Metallic and shimmer lids also suit summer; I’d press the shadow on with a finger or damp brush to keep the shine concentrated. Soft pastels work too.
How to make eyes pop more with makeup?
Start with a primer, then use one matte and one shimmer shade in the same look for depth.
Add a defined liner, such as a sharp black wing, and curl your lashes before applying a volumizing mascara. Build color in thin layers and blend with a clean, fluffy brush so edges look soft, not patchy.