Eye makeup for monolid eyes lasts all day only if the primer has actual tack to it. A thick coat does the opposite, building texture that makes shadow slip faster. Urban Decay’s formula works because it dries to a thin film oil cannot break through, but the real condition is how sparingly you apply it.
1. Eye Primer for Monolids
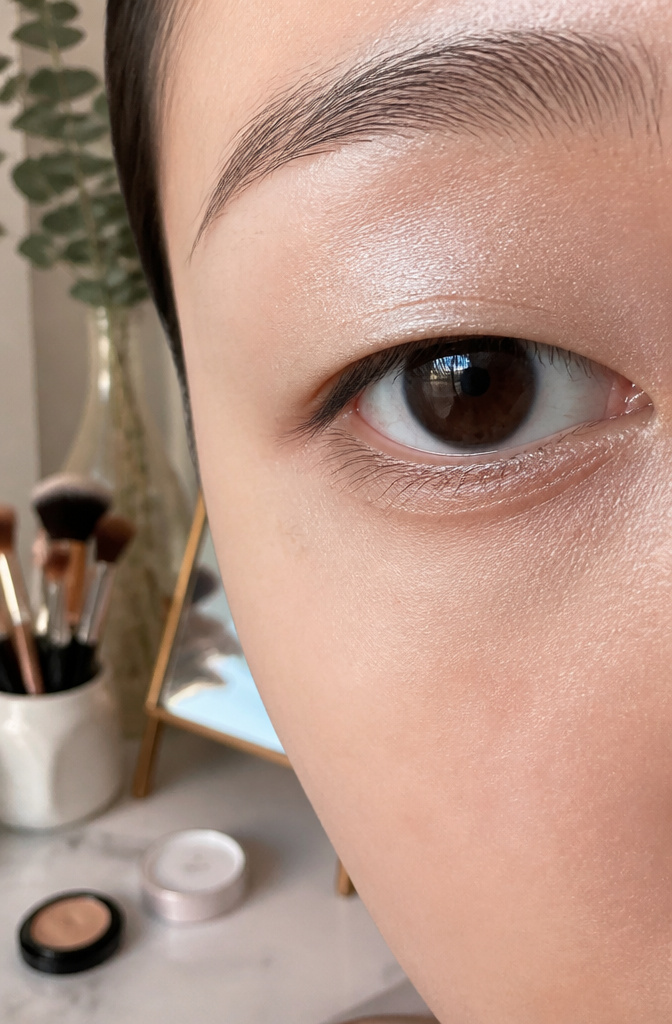
A monolid’s flat surface leaves nowhere for excess oil to settle, so shadow and liner slide off fast. Primer is the step that keeps everything where you put it. The tackier formulas grip best on skin with no crease to anchor them. Urban Decay Eye Primer is the one most often named for this, and anything with similar tack works the same way: it forms a thin, dry layer that shadow sticks to and oil cannot break through.
Apply it sparingly. A thick coat builds texture, and texture makes makeup slip faster, not slower. Blend it to an even film, let it set a moment, then layer shadow on top. Colors read truer over primer than over bare skin, and they stay at that intensity through heat and long hours. Without it, even waterproof liner can transfer to the upper lid where the lash line touches skin with every blink.
We all deal with lid grease, but Asian eyes are particularly prone to it since there’s no crease to help catch the excess. That’s why women with monolids should never, ever skip eye primer. It’s magic at locking down any shadow and liner you put on top. I’m a big fan of the Urban Decay one, but anything on the tackier side will do.
— Glamour
What this means in practice: one thin layer on the lid and a touch more under the eye if you wear liner or mascara on the lower lash line. That second spot is where smudges usually start by noon.
2. Vertical Eyeshadow Blending
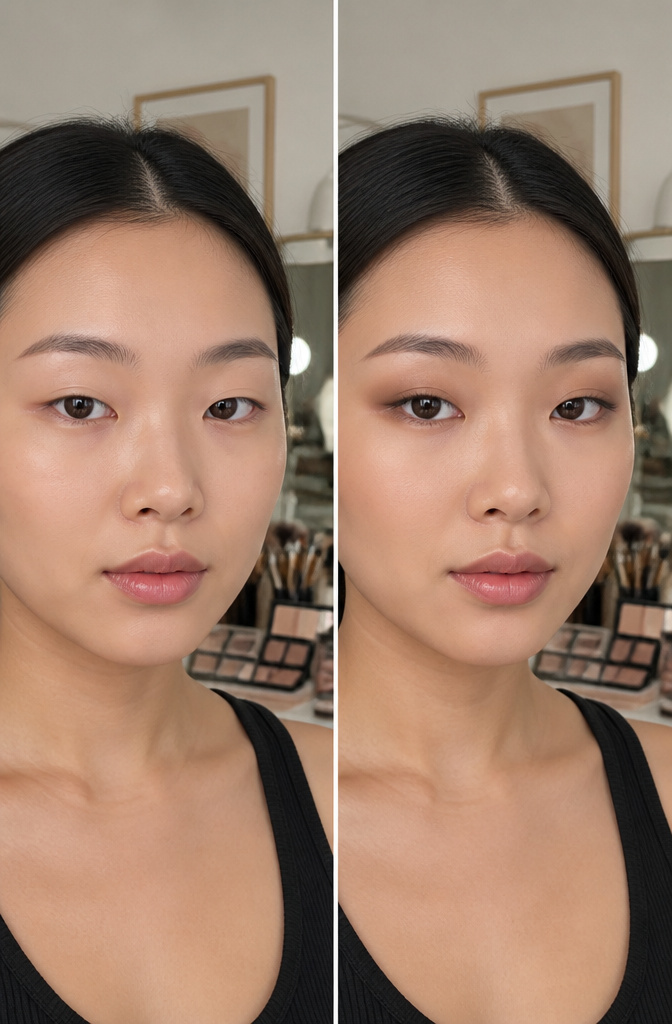
Horizontal shadow application was the first habit I had to break after years of watching tutorials built for creased lids. Those videos teach a predictable arc: light on the inner corner, dark on the outer V, blend sideways toward the temple. On a monolid, that sideways sweep competes with the naturally flat plane of the lid. The color has nowhere to settle, so it either disappears or pools in a line you did not intend.
Vertical stacking works with the flat shape instead of against it. A medium matte shade goes directly onto the mobile lid, blended upward toward the brow bone rather than outward toward the ear. A deeper tone sits on top or slightly above, creating depth through layers of color rather than the illusion of a fold. The result reads as dimension from the front, where monolids are actually seen, rather than from a three-quarter angle that flat lids do not naturally present.
The shift feels strange the first three or four tries. Your hand wants the sideways motion. After that, the control is better. Color stays where you place it, and the eye shape looks amplified, not reconstructed.
3. Faux Crease Technique
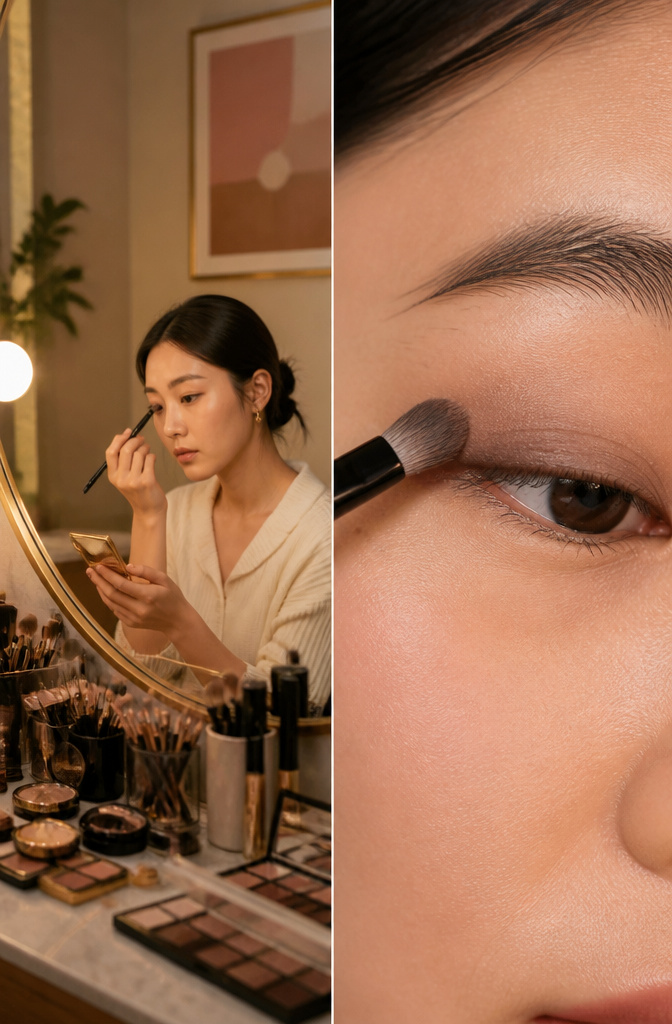
A faux crease sits about two to three millimeters above your natural lid line, not at the brow bone where a standard crease tutorial would send you. I learned this the hard way after months of shadow that looked fine straight-on but vanished the moment I turned my head.
The placement matters because monolid skin shifts as you move. Color placed too high gets swallowed when your eyes open; color placed exactly at the fold line breaks apart as you blink. That slightly elevated band of medium-toned matte shadow, something like a soft taupe or muted mauve, stays visible from the side and from below because it sits on skin that does not move as much.
Blend the edge upward with a clean brush, but stop before you reach the brow. The gradient should be soft enough that someone standing next to you cannot name where shadow ends and skin begins, yet defined enough that the arc still reads as a structural line rather than a smudge. I use small circular motions at the boundary and then sweep the residue toward the temple.
Check your work in a mirror held below eye level. If the arc disappears from that angle, the color is too low or too softly diffused. Build it again, a thin layer at a time, until the illusion holds from every viewpoint you can test alone.
4. Lower Lash Line Definition
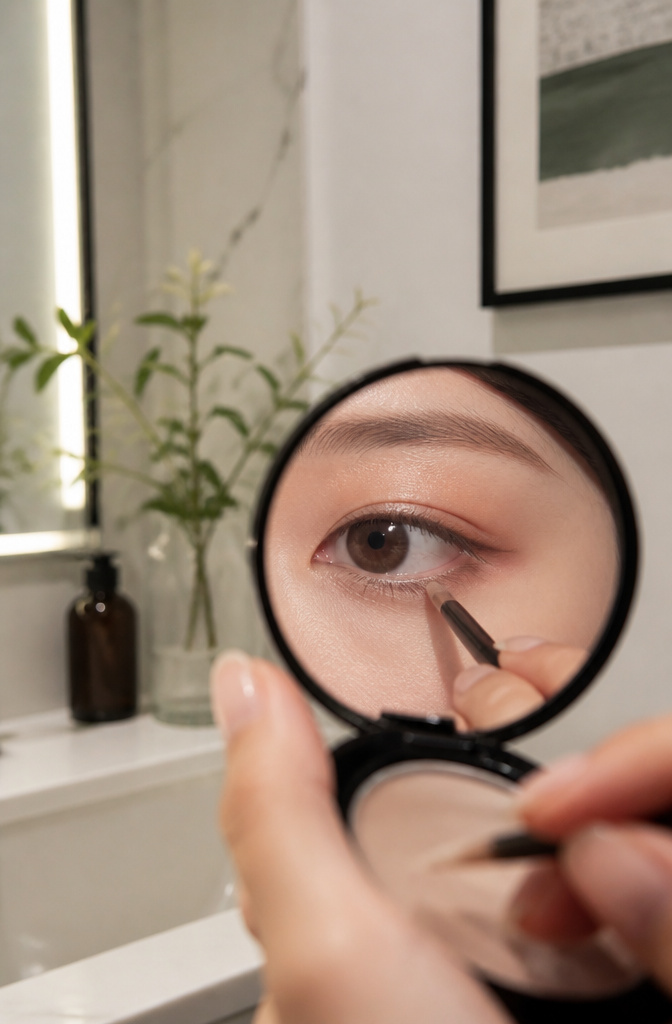
Lining the lower lash line instead of the waterline keeps monolid eyes from looking smaller. I learned this the hard way after months of tightlining my waterline with black pencil and wondering why my eyes photographed shut. The trick is working a soft liner or dark shadow on a thin brush right under and between the lower lashes, then blending down and out so the edge diffuses. Leave the actual waterline bare; that negative space creates the illusion of a larger, more open eye.
Color on the lower lash line also balances looks where lid space is scarce. Applying the same shadow from your lid to the lower lash line ties the shape together, or you can run a soft gradient underneath for something more editorial. Either way, keep the pigment low and blended so it defines without weighing the eye down.
5. Waterproof Eyeliner
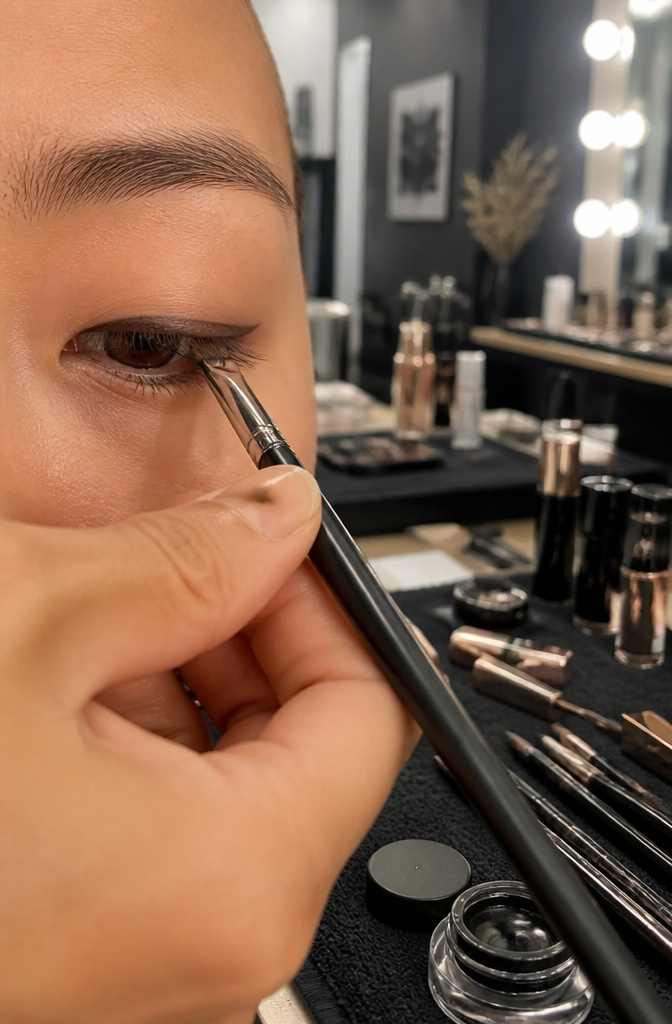
Gel and cream liners win on monolids because the brush gives you the control a felt tip never will. You can press the product right into the base of the lashes, building in thin layers instead of gambling on one clean stroke that might transfer the second the lid folds.
Tightlining is the move that makes the work last. Run the liner along the upper waterline so the color sits between the lashes, not above them. This keeps the line visible when the eye is open, and it removes the gap where pencil usually smears against the skin.
Bobbi Brown Long-Wear Gel Eyeliner holds up on oilier lids and draws smooth without skipping. MAC Fluidline in Blacktrack gives the same gel control with a slightly firmer set once it dries. For a pencil option, L’Oreal Paris Infallible Pro-Last Waterproof goes on the waterline first to thicken the lash base, then stays put for the stretch toward the outer corner. Build the wing in increments. A single thick line on a monolid has nowhere to go but up, or more often, onto the brow bone by noon.
6. Lash Curling and Waterproof Mascara
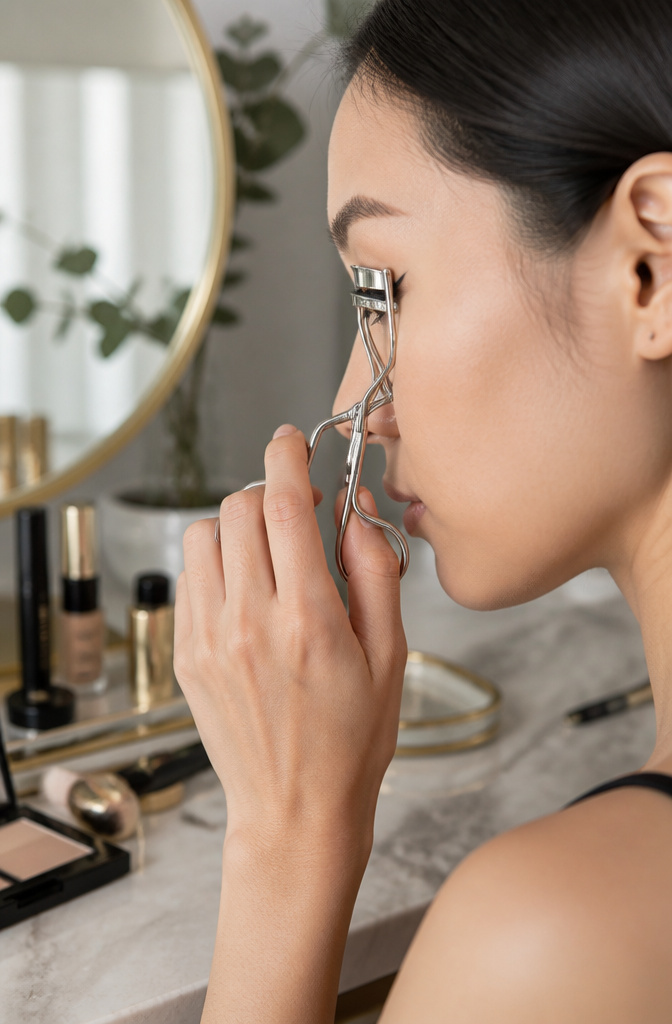
A lash curler pressed right at the root, then walked up the length in small squeezes, gives monolid eyes the lift that opens the whole shape. The curl collapses fast without waterproof mascara holding it there, which is why the pairing matters more than the product itself. The Shu Uemura Iconic Eyelash Curler fits most eye shapes for this kind of root-to-tip work, and the Kissme Heroine Make Mascara stays put without the black smudges that land on the lid when the brush is too bulky. If your lashes need extra grip, a coat of L’Oreal Paris Voluminous Lash Primer underneath builds the volume and gives the mascara something to cling to. Heat the metal curler with a hair dryer for a few seconds first, dry it off, then press; the warmth sets the bend the way a curling iron does for hair, and the waterproof formula locks it until you remove it.
7. Eyeliner Shapes That Work
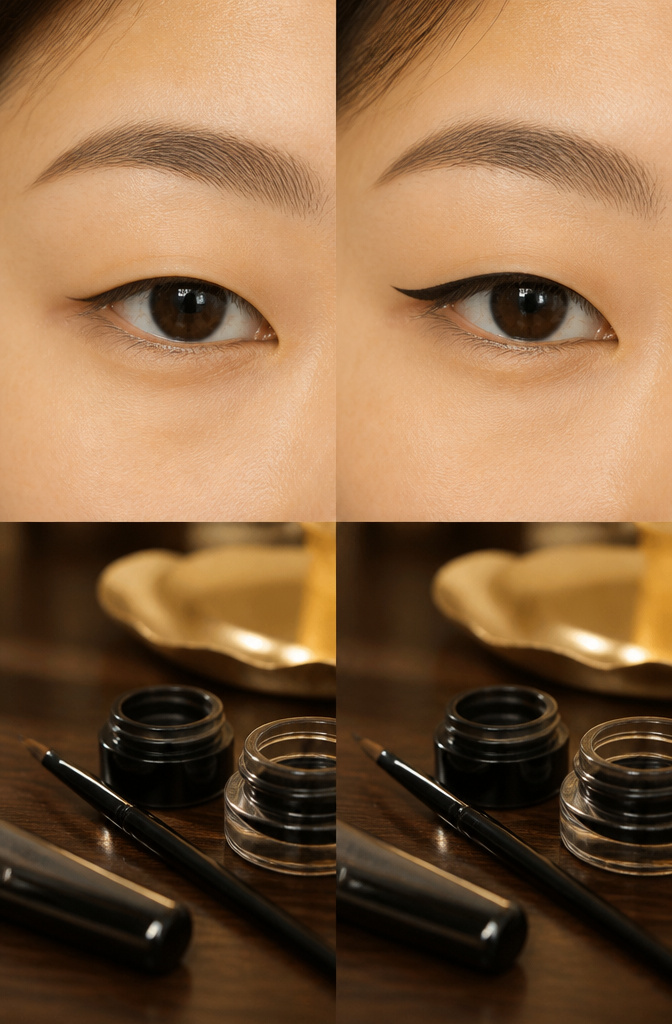
A gel liner and a thin firm angled brush give the control you need for monolid eyes. Paint the liner all over the lid, hugging the lash line as close as possible, so the line stays visible when your eye is open. Extend it past the outer corner into a point, and add a pointed tip at the inner corner too: this elongates a smaller eye shape without fighting the natural structure.
The classic cat-eye tricks from standard tutorials often disappear the moment a monolid opens. The fix is building the wing where the lid actually faces outward, not where a crease would sit. A liquid pen can skip or drag on skin that folds against itself, which is why the brush method wins for getting into the lash line and controlling the contour.
For a graphic shape that holds, set the liner before it fully dries. Dip a thin brush into a shadow that matches your liner color and press it over the gel. This seals the formula and cuts the friction that breaks most liner down on lids with skin-on-skin contact.
8. Strategic Shimmer Placement
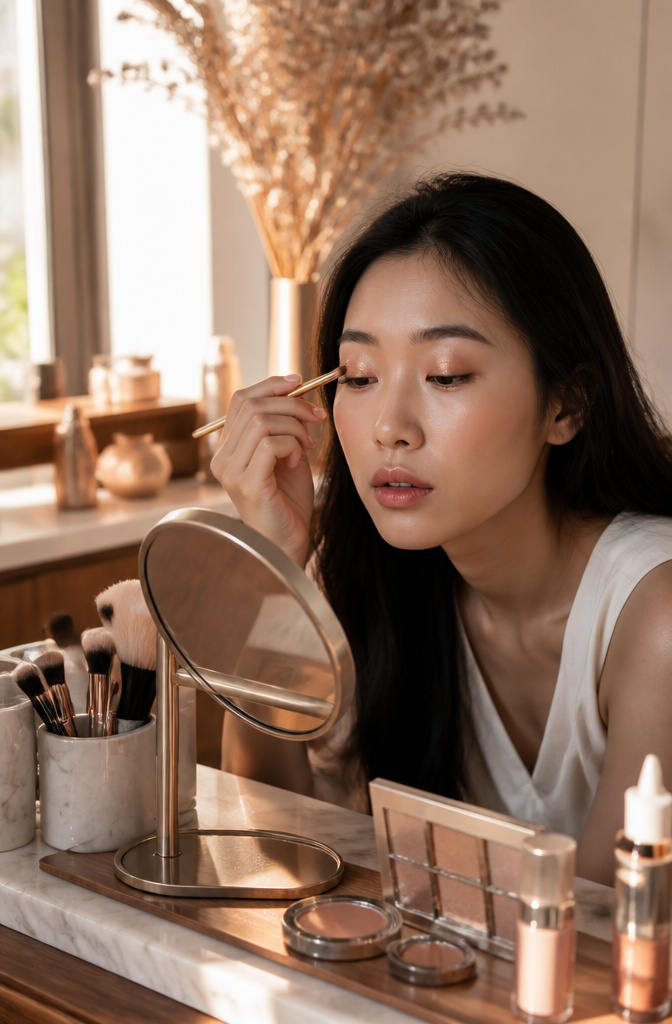
Shimmer on monolid eyes behaves differently than on eyes with a visible crease, where a fold catches and disperses light naturally. Without that architecture, placement matters more than the product you buy. The center of the lid and the inner corners are where shimmer actually does work: those two spots recede slightly and light bouncing off them creates the illusion of depth and openness.
I learned this the hard way after sweeping champagne shadow across my whole lid like the tutorials showed. The result was a flat, reflective plane that made my eyes look smaller, not larger. Dior Flash Luminizer in the inner corner fixes this: a pinpoint of it right next to the bridge of the nose, not across the entire inner V, brightens without drawing attention to the rounded shape monolids often have there.
Misplaced shimmer flattens the eye further. Too high toward the brow bone, and the lid looks puffy; too wide across the lid, and you lose any dimension the matte shades built. The product can be gorgeous and expensive and still fail if it sits in the wrong zone.
9. False Lashes for Monolids
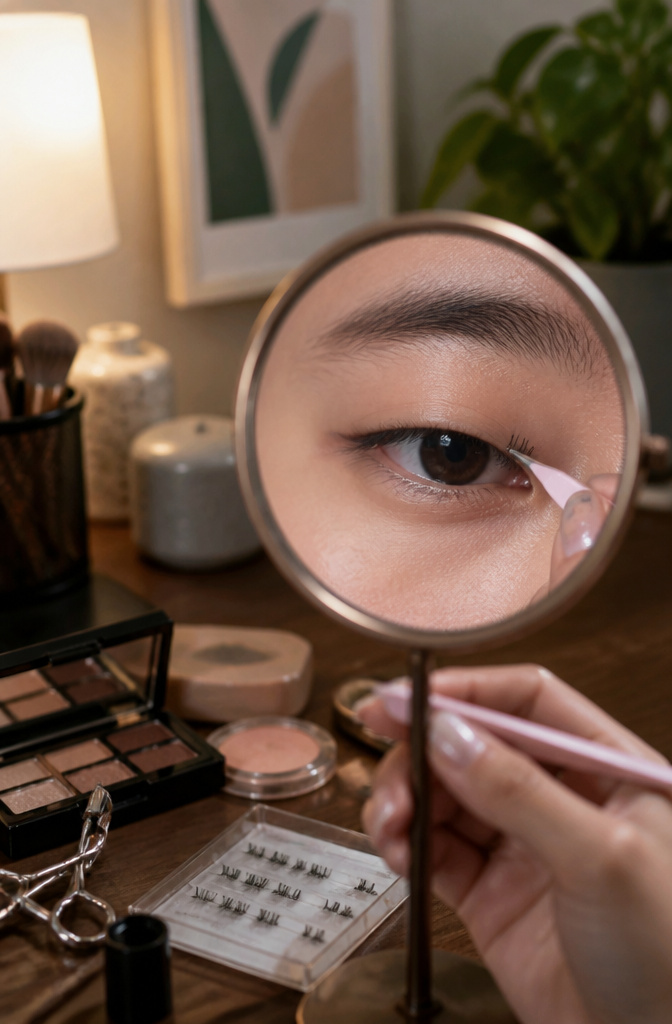
Strip lashes never sat right on my monolids. The band would land on the mobile lid itself, so every blink pushed the fibers upward until they pointed at my brows or folded back on themselves. Full strips also swallow the subtle shape monolids already have, trading it for a generic doll-eye curve that reads as costume on an everyday face.
Individual lashes, placed only at the outer third, changed the math. Three or four clusters right where the lid meets the orbital bone create lift without adding weight where the lid is already doing work. The eye reads as more open because the emphasis lands on the horizontal width, not vertical volume.
A strong band matters more than lash length. Without the structural support, even lightweight individuals droop on monolids and close the eye instead of opening it. I look for clusters with a thicker base thread or a short stem that grips the skin directly, not styles that rely on the full strip’s tension to hold their curve.
Wispy sets that alternate thick and thin clusters read as natural from conversation distance. The variation breaks up the silhouette so the lash line doesn’t register as a solid dark bar, which on monolids can flatten the eye into a single plane.
Eyeliner Techniques That Stay Put
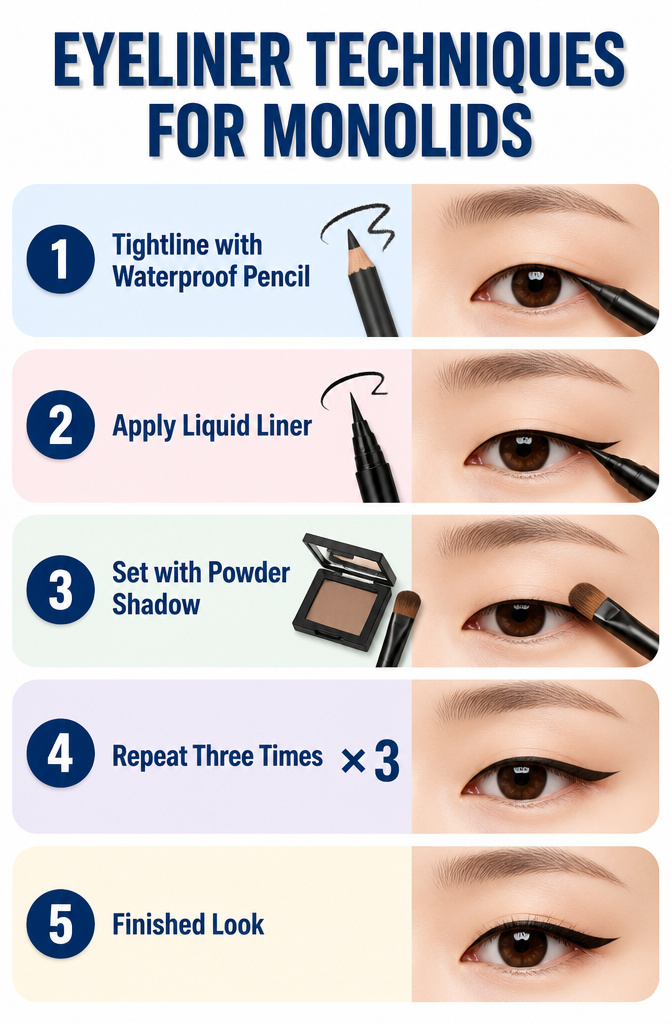
Waterproof gel liner on a monolid faceplants by noon if you treat it like a single stroke and go. The friction from lid-on-lid contact breaks down even the most stubborn formula, so set each layer with matching shadow before it fully dries. I work in hair-thin passes, tightlining first with a waterproof pencil like the L’Oréal Paris Infallible Pro-Last to build the lash base, then switching to a liquid such as the L’Oréal Paris Voluminous Lash Paradise for the wing. Each pass gets thirty seconds to set, then I press a matching powder shadow over it with a thin brush. Three layers this way outlasts one thick swipe that looked perfect at 7 a.m. and raccooned by lunch. The tool matters too: a flat angled brush pushes shadow into the liner shell better than a fluffy one, which just dusts the surface.
Eyeshadow Palettes That Work for Monolids
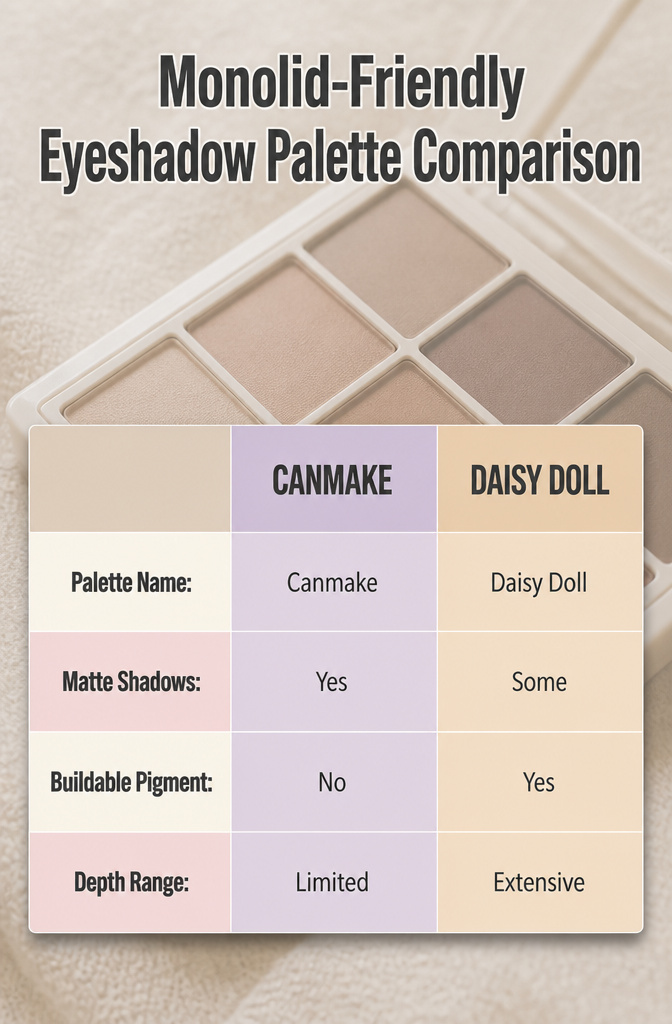
Matte transition shades are the backbone of any monolid-friendly palette, and the ones worth keeping in your bag have enough depth to build a faux crease without leaning on sparkle. The Canmake Petit Palette Eyes stacks eight matte eyeshadows in complementary hues that cling to the lid, which matters more on monolids where the skin above can press against the shadow and dull the finish. Pigment that stays put through that contact is what separates a palette you reach for from one that collects dust.
Buildable pigment is non-negotiable. A shade that goes fully opaque in one swipe gives you no room to create the gradient that monolid eye makeup relies on, darkest at the lash line and lightening toward the brow. The Daisy Doll Eye Color Palette works for this with sheer pigmentation that layers without muddying, though the radiant finish means you’ll want to pair it with a matte single for the transition itself.
For faux crease work, you need at least two depths darker than your natural lid tone: one to sketch the fold, another to deepen the outer corner in that soft wing shape that lifts the eye. A palette without that range forces you to buy twice.
What Monolid Means for Makeup
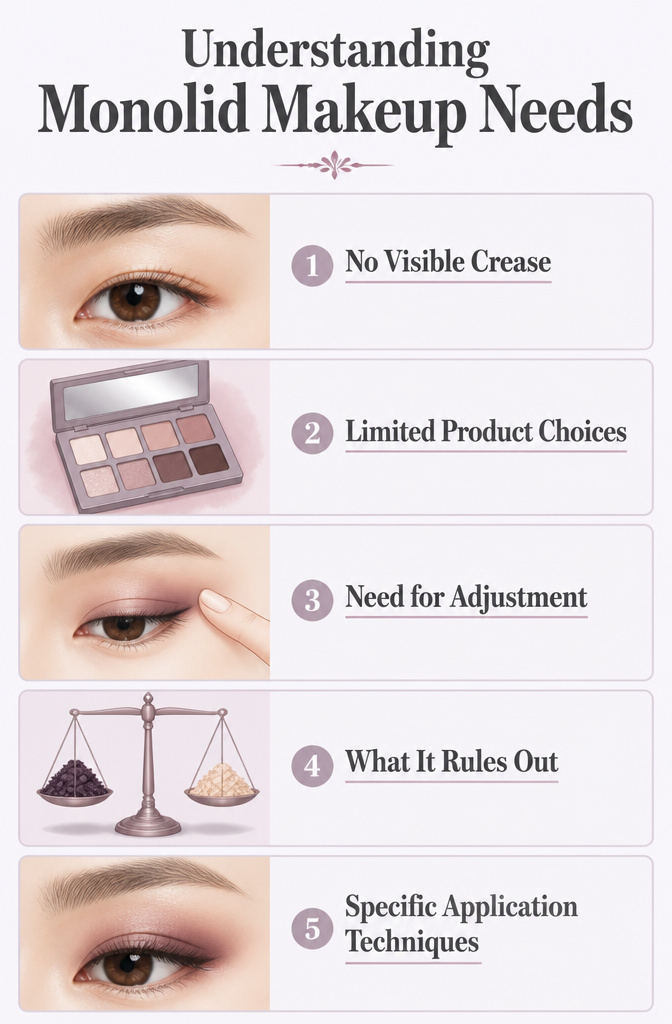
A monolid is an eyelid shape where no visible crease separates the lid from the brow area. Most standard Western eye makeup tutorials assume a creased eyelid exists to work with, which leaves monolid techniques almost entirely unaddressed. The usual instruction to sweep dark shadow into the crease and build outward from there simply has no landing spot on this eye shape.
Makeup marketing has historically centered on creased eyelids as the default, which shapes everything from palette layout to the visual guides printed inside. Eyeshadow instructions typically direct you to apply lightest to darkest toward the outside of the eye, with dark shades concentrated in the crease. Following this on monolid eyes can put too much visual weight in one area, creating an imbalanced look. The gradient that actually works runs darkest at the lash line to lightest toward the brow bone, following the natural shadows already present.
This gap between generic advice and actual anatomy matters because technique choice starts from understanding what the eye actually does. The lack of a crease is not a problem to correct; it is the structure you build from.
Products That Show Up and Stay
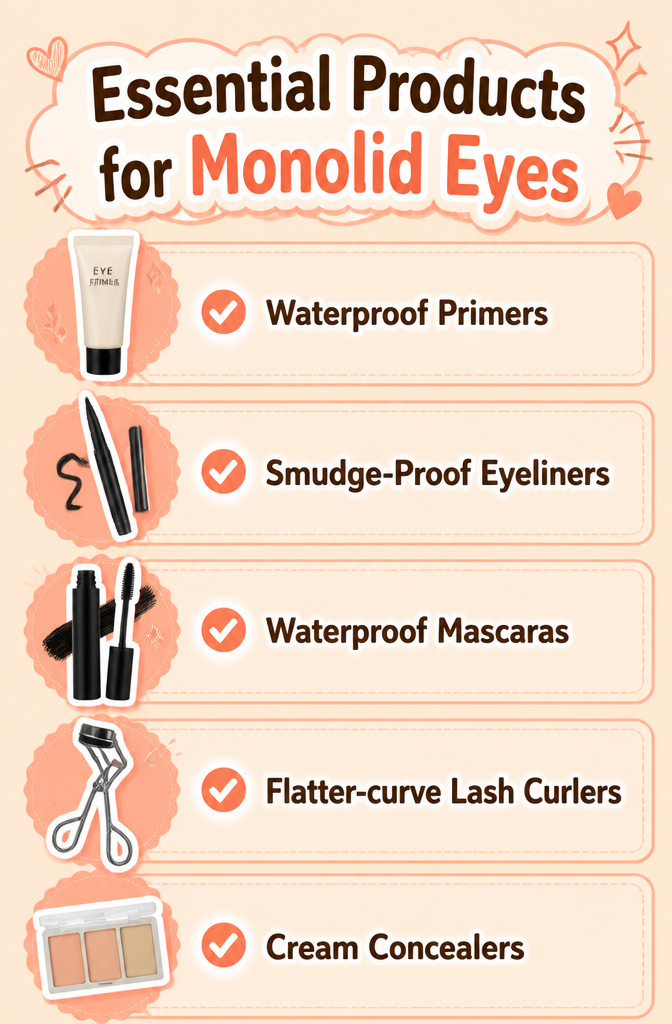
The products that actually solve problems for monolid eyes fall into five groups, and most of the wins come from how they wear, not how they swatch.
- Primers need to grip without adding thickness. Ones labeled "eye primer" rather than "concealer" tend to set flat and hold shadow where you place it; anything too emollient slides straight into the fold.
- Eyeliners that stay put are the gel pencils and liquid pens marked waterproof or smudge-proof. Pencil alone usually migrates upward within a few hours on a lid with no crease to catch it.
- Mascara has to be the waterproof kind. Regular formulas transfer onto the upper lid from the lash line because the skin sits closer to the lashes than on eyes with a defined crease. A tubing mascara is worth trying if waterproof still leaves marks.
- Lash curlers with a flatter curve fit the monolid shape without pinching the inner corner. The standard deep curve leaves gaps and makes curling the outer lashes impossible.
- Concealer sits at the anchor of the look. The Daisy Doll Concealer Palette gets mentioned because the shades run slightly peach rather than flat yellow, which corrects the blue-gray tone that pooling product can emphasize on monolid eyes. Cream that sets to a satin, not a powder, avoids the creased line that forms by midday.
What convinced me, reading through a dozen of these, was that waterproof is non-negotiable for three of the five categories and that the flat curler shape is the detail most beginners skip.
Frequently Asked Questions
What are the best makeup tips for monolid eyes?
Start with a tacky eye primer that grips shadow and liner against flat, oil-prone skin. Blend eyeshadow vertically, stacking shades upward toward the brow bone instead of sideways toward the temple. Define the lower lash line with soft liner or dark shadow placed under and between the lashes, not on the waterline, so the eye looks larger and more open.
How do I create a faux crease for monolid eyes?
Place a medium-toned matte shade about two to three millimeters above your natural lid line, not at the brow bone. This spot sits on skin that shifts less when you blink or move, so the arc stays visible from every angle. Blend the edge upward with a clean brush using small circular motions, then check in a mirror held below eye level to confirm the illusion holds.
What type of eyeliner is best for monolid eyes?
Waterproof gel liners applied with a thin firm angled brush give the control and staying power monolids need. Tightline the upper waterline so color sits between lashes rather than above them, removing the gap where liner usually smears. Set each thin layer with matching shadow before it fully dries to survive the friction of lid-on-lid contact.
How can I make my lashes look fuller with monolid eyes?
Curl from root to tip in small squeezes, heating the metal curler with a hair dryer first so the bend sets like a curling iron does for hair. Lock the curl with waterproof mascara, since regular formulas transfer onto the upper lid where skin sits close to the lash line. For extra lift, place three or four individual lash clusters at the outer third only, choosing styles with a thick base thread or short stem that grips skin directly.